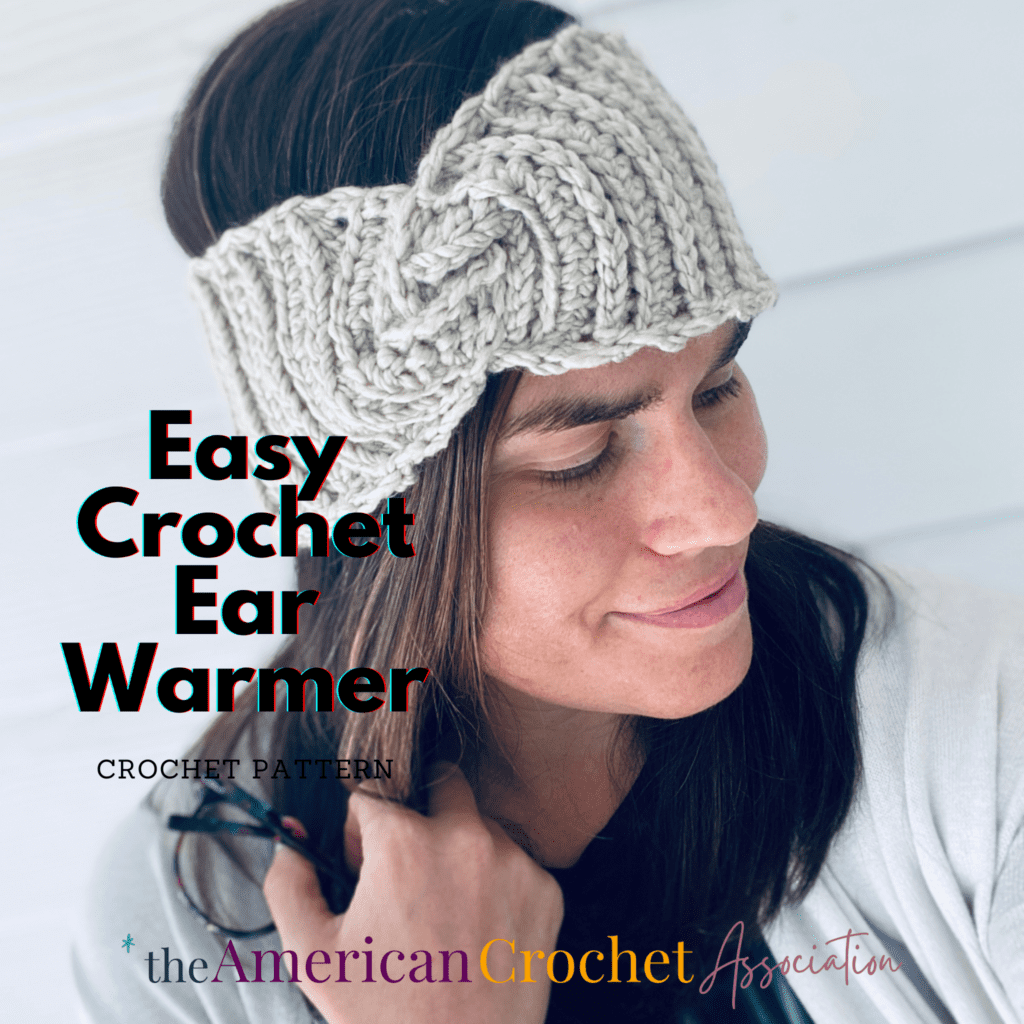
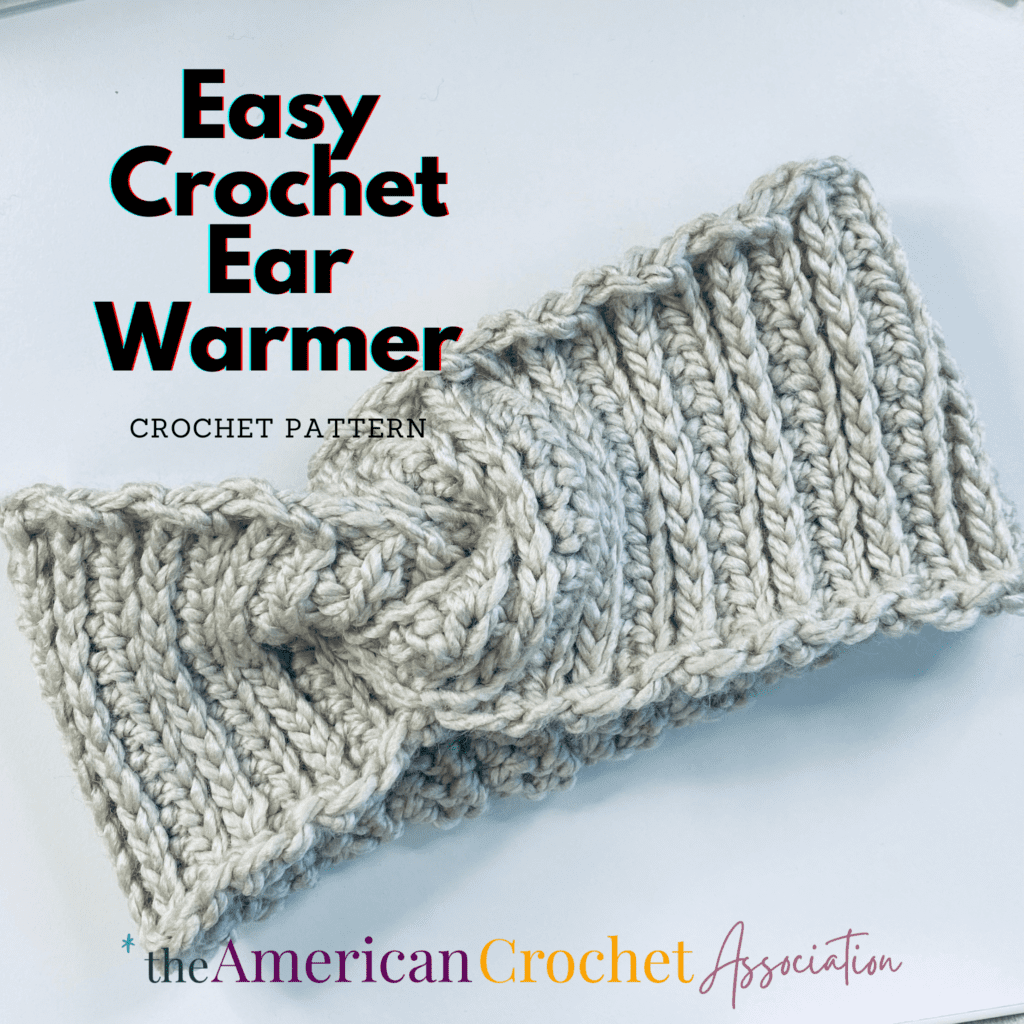
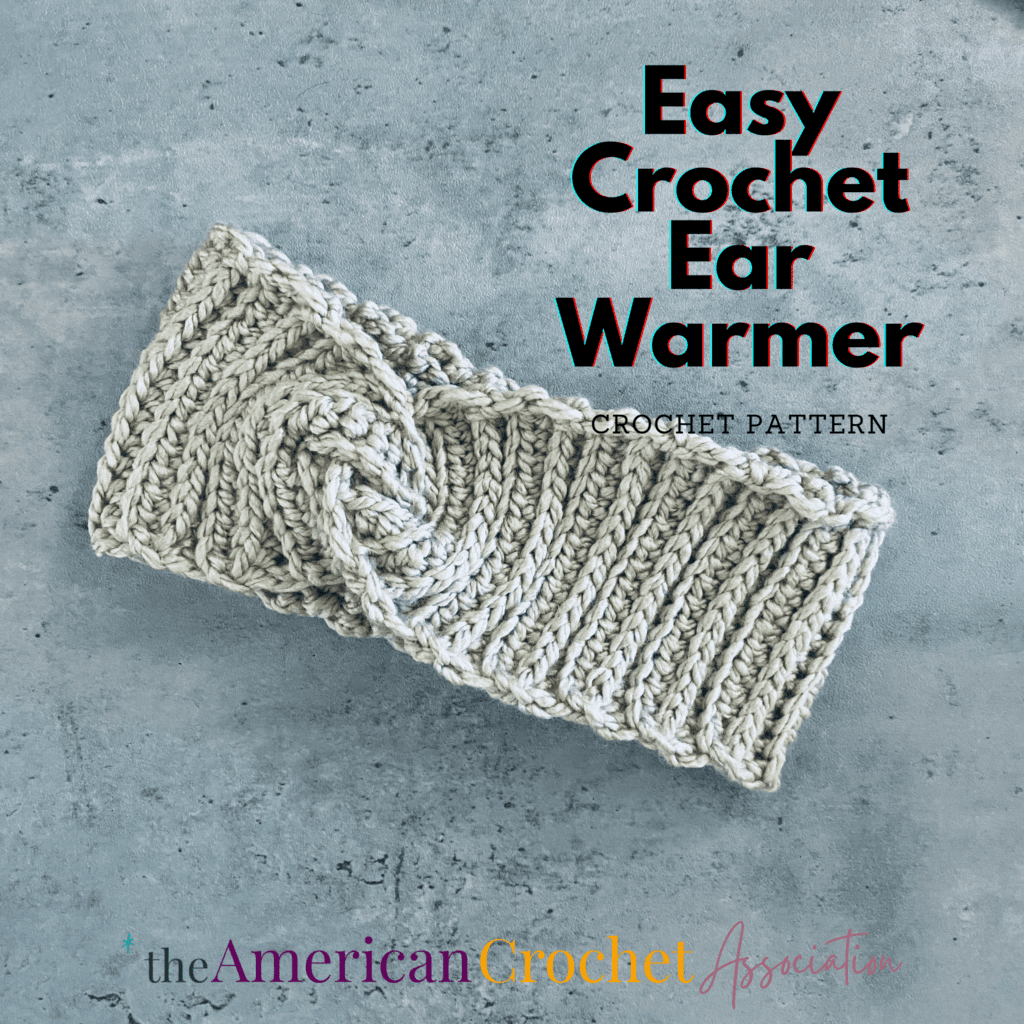
Make the Twisted Crochet Ear Warmer easily and quickly with this beginner-friendly pattern, available in five different sizes!
Using a bulky weight yarn will help to stitch a project in no time; that’s exactly why I used it to create this twisted crochet ear warmer!
Make this ear warmer accessory in various yarn weights, types, colors, and fibers, especially when you measure as you go for the best size and fit.
Beginners will enjoy this quick-to-stitch project because it uses just two basic crochet stitches: chain, half double.
No matter how long you’ve been crocheting, this fabric is simple and fun to create because the stitches are worked into the back loops and the third loops.
These variations in stitch placement are easy to work, and you’ll have a gorgeous texture on one side of your finished fabric.
In cooler weather, ear warmers make fantastic accessories, and you can effortlessly create one for everyone in your life since the Twisted Crochet Ear Warmer is provided in five different sizes.
Moreover, by working in rows, you have the flexibility to adjust the size of your ear warmer as you progress, ensuring you achieve the perfect fit.
- Accessories are quick and easy projects to work up, especially with super bulky yarn!
- Ear warmers are great for people who don’t like to wear hats, or want to avoid “hat hair”.
- This twisted ear warmer is a great gifts, and can be made in a wide range of sizes.
- You’ll get to practice a lot of crochet skills: Rows, stitch tension, gauge & size, specialty stitches (like the 3rd loop and Back Loop Only), finishing techniques & more!
This post may contain affiliate links.
Table of contents
Estimated reading time: 10 minutes
Introduction
What is a twisted ear warmer?
A twisted crochet ear warmer is a headband or ear accessory featuring a twisted or braided design.
Begin by chaining the desired width, and once the total length (circumference) is achieved, fold and sew the ends of the fabric together to introduce the twist in the fabric.
Are ear warmers better than hats?
Ear warmers offer several advantages over traditional hats, depending on your personal preferences, activities, and personal style.
Here are some reasons ear warmers might be better than hats in certain situations:
- Ear warmers only cover the ears, leaving the top of the head uncovered. This can be great for people who want to avoid “hat hair”.
- Ear warmers are typically smaller and easier to carry than hats.
- Crochet ear warmers are often quicker and easier to make than hats.
While ear warmers have their advantages, it’s important to note that they may not provide as much overall warmth as a hat, which covers the entire head.
Weather conditions, your personal preference, and other specific activities will help to determine which accessory is a better choice.
Who are ear warmers suited for?
People who enjoy handmade items may appreciate the craft and personal touch that comes with crocheted ear warmers.
Additionally, those who value unique and one-of-a-kind accessories typically find themselves attracted to crochet ear warmers.
This pattern accommodates a broad range of sizes because ear warmers make excellent accessories for kids, teens, and adults.
Selecting the Perfect Yarn
What yarn should I use?
Does anyone remember Craftsy?
Before someone sold, bought, and sold them again, they introduced several yarn lines, including Sprightly Yarns Acrylic Super Bulky.
Regrettably, that line is discontinued and not available.
However, this pattern, initially designed for Sprightly Super Bulky, can seamlessly substitute other brands and fibers of the same weight.
This is also a pattern that is easy to adjust in length and width, so you can simply try different yarns and measure as you go to get the best size.
How can I choose a yarn substitute?
When a yarn is discontinued, I like to visit yarnsub.com to find substitutes.
For a close match to Sprightly Yarn Acrylic Super Bulky, I’ve gathered a list of yarns I recommend you review first, based on what was suggested by YarnSub.com:
If you would like to substitute, and use another yarn to follow this pattern, I suggest starting with the same weight yarn and making a test swatch to see if it can give you the same results.
You can read more about how to substitute yarn right here: Understanding Yarn Substitution – An Easy Reference For Crocheters
Sizing Options
How many sizes are included in this pattern?
Because ear warmers can be a great accessory for a wide age range, this pattern includes five different sizes.
Specifically, this ear warmer is available in one width (4″ across; stitches), and the length (rows; circumference) can be made in the following measurements:
- 4″ across x 16″ long
- 4″ across x 18″ long
- 4″ across x 20″ long
- 4″ across x 22″ long
- 4″ across x 24″ long
Do note that sizes by age alone are not the best detail to use when crocheting an accessory that should fit, especially around the head.
For example, not all newborns have 12″ head circumference, and not all five-year-olds have a 20″ head circumference.
Can I alter the size of this ear warmer?
This pattern is very easy to adjust in stitches and in rows.
The stitch pattern can be adjusted in any multiple, and so can the rows.
For the best fit, always measure around the head first and then crochet your accessory based on that specific measurement.
To get a list of the most popular head sizes (for hats, headbands, and ear warmers) check out these tips, and get a free cheat sheet for Newborn 12″ up to Adult Large 24″: What Size Hat To Make: Easy Guide For Crochet
Helpful Resources
Project Inspiration
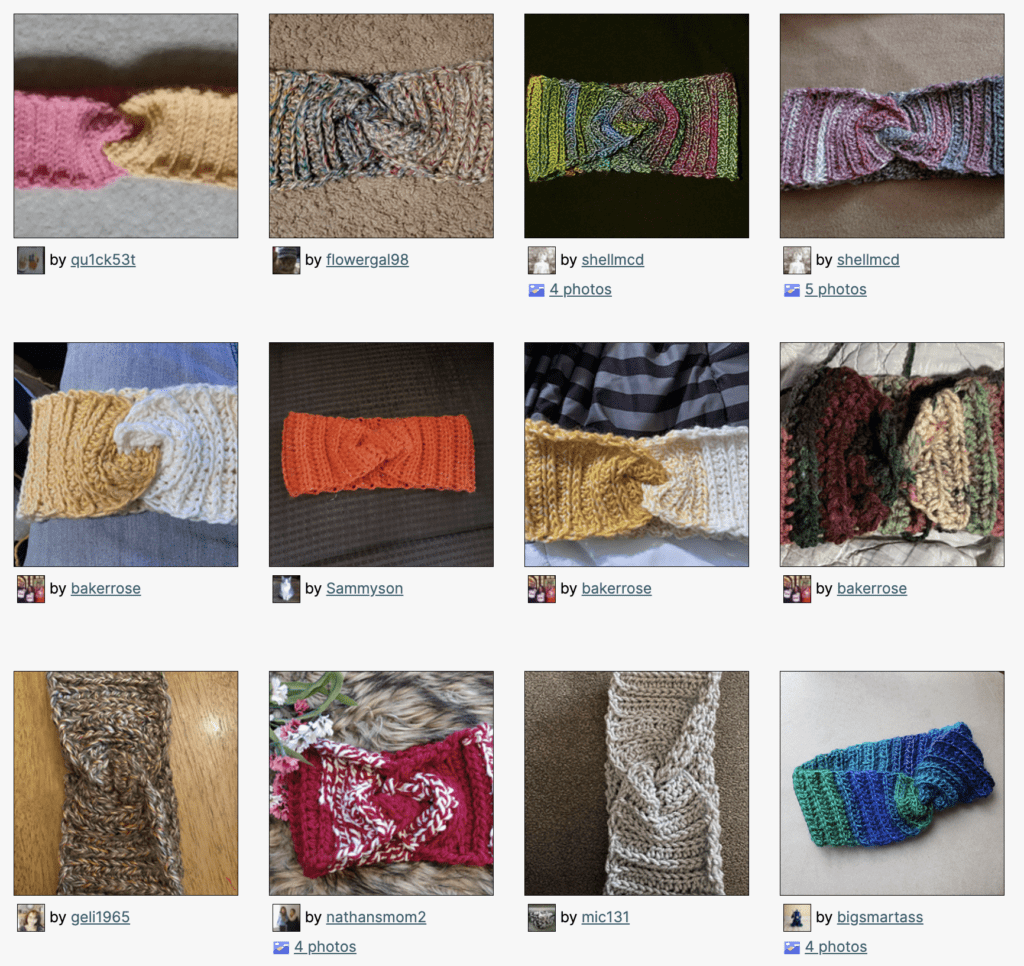
Check out other finished Twisted Crochet Ear Warmers on ravelry, right here:
Finishing Techniques
The twist in this crochet project is worked by sewing one end of the ear warmer to the other.
If you’d like to see some tips about weaving, sewing, and knotting yarn ends to finish a crochet project, check out this quick video tutorial: How to Weave, Sew and Knot Yarn Ends
Specialty Stitches
The texture in this crochet pattern is created by working basic stitches into the front loops only, and the third loops only.
These are specific parts of crochet stitch anatomy, and you can learn more about where they are (with pictures): Where do stitches go in crochet: All the places and spaces to put your hook
More Crochet Accessory Patterns
If you love crochet accessories like this twisted ear warmer, and would like to see other similar styles, we have a few more patterns you can view.
Other fun crochet accessory patterns are free to view on our site, including these popular patterns, right here:
Policy for Individual Use
This crochet pattern is designed by Salena Baca Crochet for the American Crochet Association.
Pattern instructions are protected by copyright laws.
Users must acknowledge and respect the intellectual property rights of pattern creators and designers as follows:
- This pattern is for personal use only. Pattern instructions may be accessed and used by individuals for personal, non-commercial purposes only. Users may create finished products based on the pattern instructions for personal use or gifting.
- Users may not reproduce, distribute, modify, or create derivative works of pattern instructions without explicit permission from the copyright holder.
- Selling or commercially exploiting products made from pattern instructions will require additional permissions or licensing from the copyright holder.
- It is unlawful to share or distribute pattern instructions in any way, including but not limited to: print, digital, video.
- It is unlawful to create derivative works based on pattern instructions, including but not limited to translations, adaptations, or variations.
- Users should provide proper attribution when sharing or displaying finished products made using these pattern instructions, giving credit to the original pattern creator and source.
- Users are expected to conduct themselves in an ethical and respectful manner when using pattern instructions. Users should not engage in plagiarism, claim others’ work as their own, or misrepresent the origin of pattern instructions.
By accessing and using pattern instructions, individuals agree to abide by the usage policy herein.
Users may be held responsible for any damages or legal liabilities resulting from their non-compliance with this policy.
Purchase a PDF file on Ravelry
Click Here to purchase a downloadable PDF version of this pattern on Ravelry.
Making the Twisted Crochet Ear Warmer Pattern
Yarn
Sprightly Yarns Acrylic Super Bulky, Super Bulky #6 yarn (100% acrylic; 3.5oz / 100g, 109yds / 100m):
- Suede, 1 skein (all sizes)
- Check for yarn substitutes!
Materials
- US J/10 (6 mm) hook
- Scissors
- Yarn needle
Gauge
- 14 pattern Sts = 4”
- 8 pattern rows = 4”
Sizes
Sizes are measured by width (stitches), and length (rows)
- 4” wide x 16″ long
- 4″ wide 18″ long
- 4″ wide x 20″ long
- 4″ wide x 22″ long
- 4″ wide x 24″ long
Stitch Key
- Ch(s) = chain(s)
- Hdc = half double crochet
- St(s) = stitch(es)
Specialty Stitches and Techniques
- 3rd Loop = When looking at wrong side of Hdc, horizontal bar just below front loop of Hdc St.
- Back Loop Only = When looking at the top of a St, the loop that is farthest away from you.
- Sewing
Pattern Notes
- The Twisted Ear Warmer is worked in rows, then the first and last rows are sewn together to join and form a tube (see tutorial for joining instructions).
Instructions
16 (18, 20, 22, 24)” Size
Row 1 (Right Side): Ch 15, skip 1 Ch (not a St), work 1 Hdc into each Ch across – 14 Hdc
Row 2: Ch 1 (not a St), turn, work 1 Hdc into 3rd loop of each St across – 14 Hdc
Row 3: Ch 1 (not a St), turn, work 1 Hdc into BLO of each St across – 14 Hdc
Repeat rows 2-3 until 32 (36, 40, 42, 48) rows are complete. Fasten off 20” tail.
Step-by-step photo tutorial
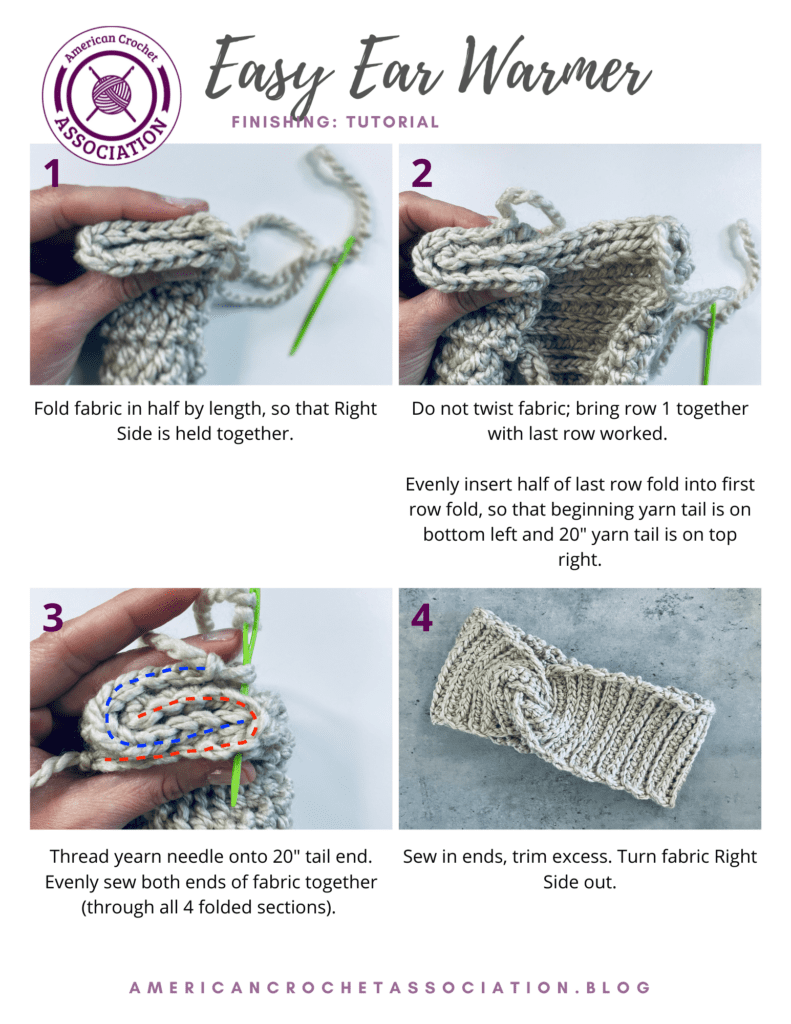
The final portion of this pattern might be tricky to work up, so this step-by-step photo tutorial should help you to get you sorted:
Finishing (all sizes)
- Fold fabric in half by length, so that Right Side is held together.
- Do not twist fabric; bring row 1 together with last row worked.
- Evenly insert half of last row fold into first row fold, so that beginning yarn tail is on bottom left and 20” yarn tail is on top right.
- Thread yarn needle onto 20” tail end. Evenly sew both ends of fabric together (through all 4 folded sections).
Video
To learn more about this pattern from Salena Baca, check out this quick video chat right here:
Click Here to share your finished project in our community!
Peace + Love + Crochet
Salena

