
Affiliate Disclosure: This post may contain affiliate links, which means the American Crochet Association may earn a small commission from qualifying purchases made through links on our site, at no additional cost to you. Learn more on our Disclosures and Disclaimers page.
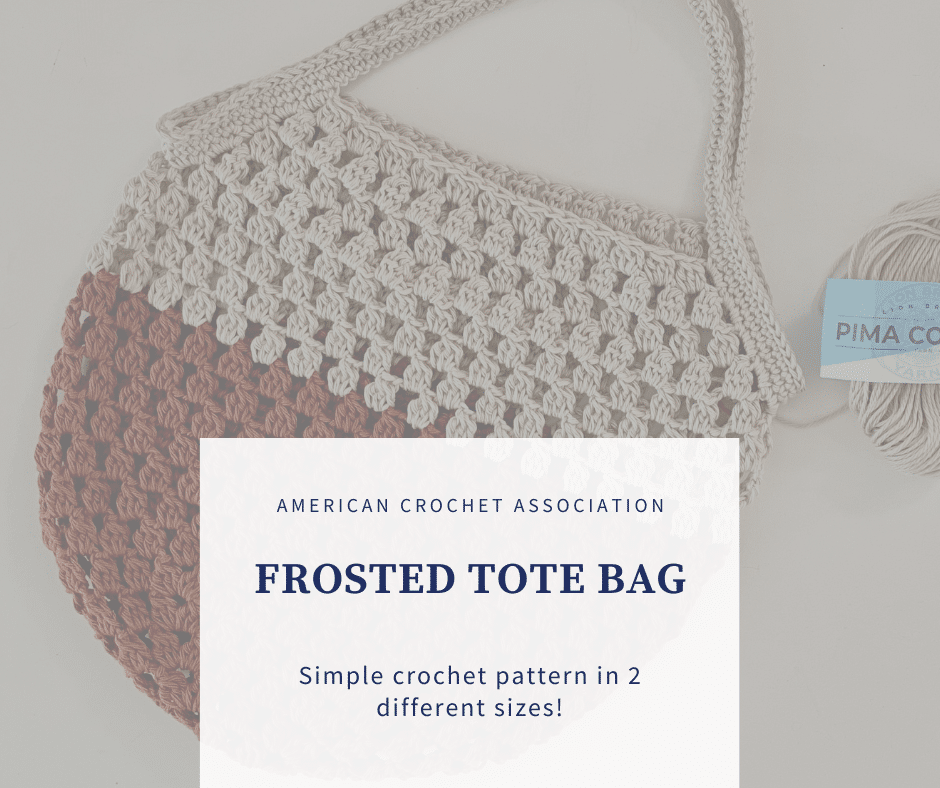
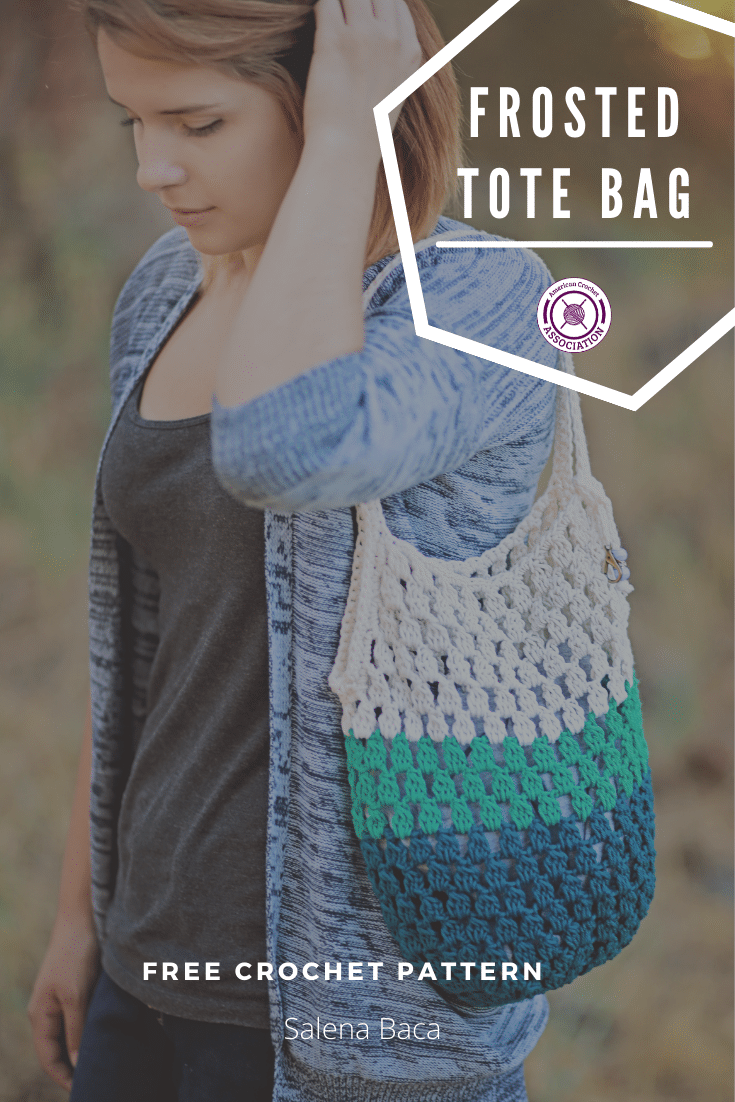
Crochet a fast and easy bobble stitch tote bag
If you love learning new crochet stitchings and trying out different techniques, give this super easy crochet tote bag a try today!
The Frosted Tote Bag is easy enough for beginners to crochet because it is worked using basic stitches including the Chain, Single, Double, Slip and Bobble stitches!
This crochet tote bag is worked with a basic Bobble stitch to create a super textured and sturdy design, making this a mindless project to follow that’s also fun and interesting.
The bobble stitch brings a delightful texture to this fabric, adding a touch of whimsey and charm that’s not boring.
Never worked a bobble stitch in crochet before?
Don’t worry!
Whether you’re a seasoned crochet expert or just beginning to explore the depths of this fiber art, our step-by-step bobble stitch tutorial and pattern instructions are designed to cater to all skill levels.
This technique will be the centerpiece of our project, elevating a simple crochet tote bag to a fashion-forward accessory that you’ll be proud to showcase wherever you go.
Before we dive into the wonderful world of bobble stitches, I want to take a moment to share the magic of crochet tote bags.
These projects are versatile, practical, fashionable, and a must-have accessory for any crochet enthusiast.
And I’m warning you now… this crochet tote bag is a showstopper!
Imagine strolling through the farmer’s market or heading to the beach or pool, your crochet tote bag adorned with charming bobbles that catch the eye of everyone around you.
Prepare yourself now, because everyone will ask where you got your Frosted Tote Bag from!
What yarn is best for the Frosted Tote Bag?
One of my favorite things about crochet tote bags is choosing the yarn!
This pattern was written with Knit Picks Dishie, which is a worsted weight #4 yarn made with 100% cotton.
I like this choice because it is durable enough for functional projects, is reasonably priced, and it wears well over time.
However, you can absolutely use other blends of fiber to your taste as long as you feel the yarn will be durable enough to create a study fabric for your bag.
To learn more about yarn weights and fibers, including how to substitute yarns, check out this article (it has helpful charts you can save for later), RIGHT HERE.
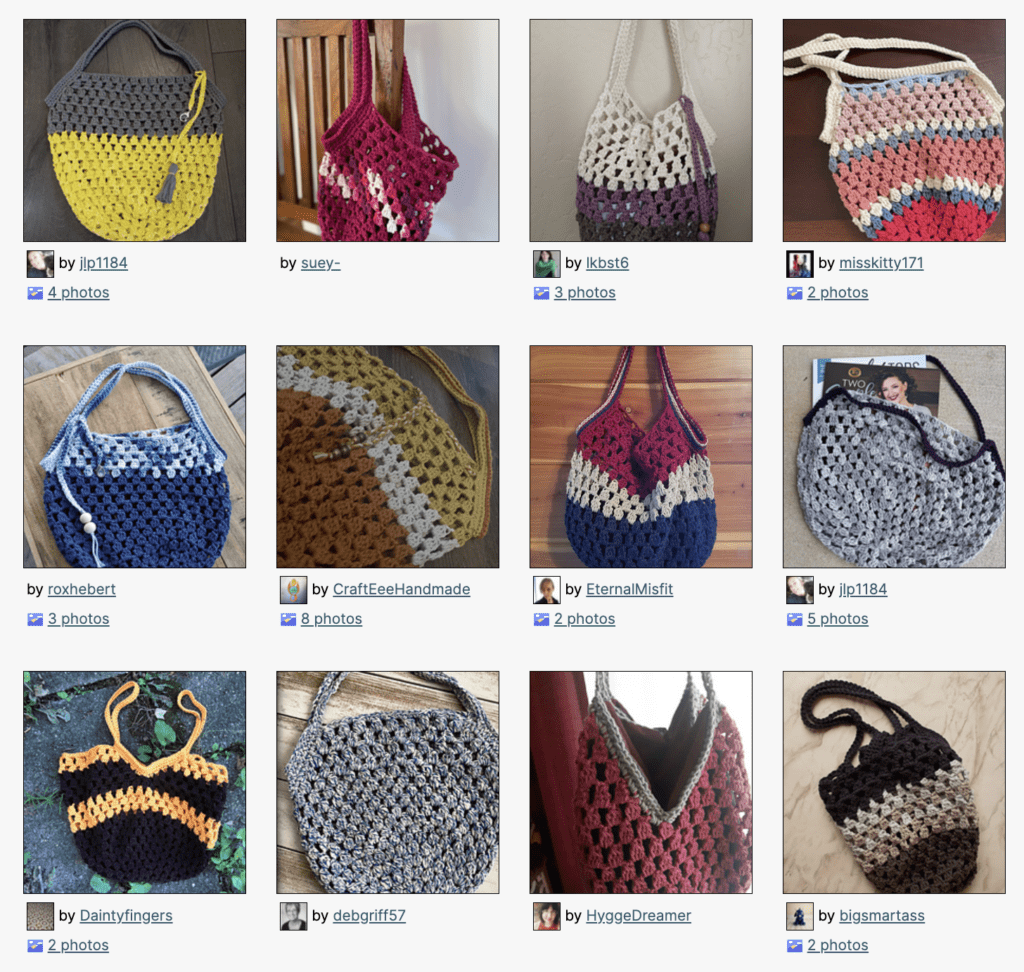
While the example shows two contrasting colors used, people who added their finished projects on Ravelry used lots of different color combinations.
You can view them all right here for some extra inspiration: https://www.ravelry.com/patterns/library/frosted-tote-bag
What size is the Frosted Tote Bag crochet pattern?
This crochet tote bag is actually written in two different sizes in width around and length tall:
- 22″ around (11″ flat) x 13″ tall (not including the handles)
- 26″ around (13″ flat) x 15″ tall (not including the handles)
If you’re wondering what these sizes mean, I think they can be categorized as a small and medium size bag.
The small size bag can be perfect for children, a book or two, lunch or snack items, leafy produce, or an outfit change to take to the beach or pool.
The medium size bag can be a great choice for a crochet WIP, yarn haul, overnight bag, bulky produce, or a general shopping bag.
Key takeaways of the Frosted Tote Bag crochet pattern:
- Two different sizes are included in this pattern collection: 22 (26)” around x 13 (15)” tall
- Tote bags are super quick and easy projects to work up!
- You can use yarn you already have in your stash!
- This project works great with cotton yarns, and plant-based fibers!
- You’ll get to practice a lot of crochet skills: joined rounds, stitch tension, gauge & size, Bobbles, color changes (optional), finishing techniques & more!
Helpful resources when making the Frosted Tote Bag crochet pattern:
Need some inspiration?
Check out other finished projects, here:

Not sure how to work the bobble crochet stitch?
Here’s a video, right here:
Need more information about specialty stitches?
There are key differences between the bobble, cluster, popcorn, and puff stitches in crochet and you can learn more about each one (and grab a cheat sheet) RIGHT HERE:
Wondering how to change colors in joined rounds?
Watch our video tutorial, right here:
This Pattern Is Copyright Protected: Policy for Individual Use
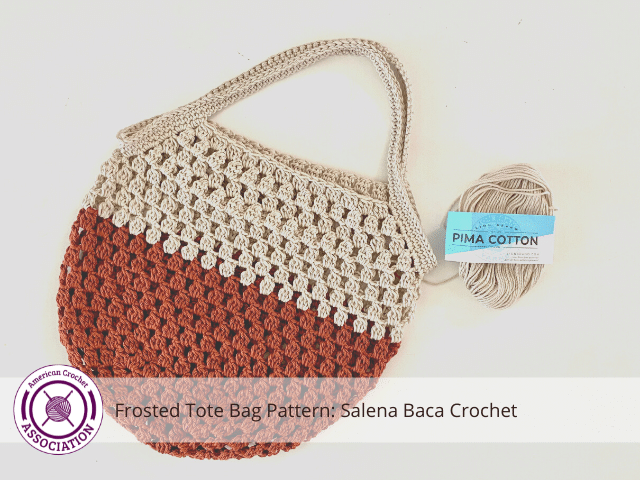
This crochet pattern was created by Salena Baca Crochet for the American Crochet Association. These pattern instructions are protected by copyright laws. Users must acknowledge and respect the intellectual property rights of pattern creators and designers as follows:
- This pattern is for personal use only. Pattern instructions may be accessed and used by individuals for personal, non-commercial purposes only. Users may create finished products based on the pattern instructions for personal use or gifting.
- Users may not reproduce, distribute, modify, or create derivative works of pattern instructions without explicit permission from the copyright holder.
- Selling or commercially exploiting products made from pattern instructions will require additional permissions or licensing from the copyright holder.
- It is unlawful to share or distribute pattern instructions in any way, including but not limited to: print, digital, video.
- It is unlawful to create derivative works based on pattern instructions, including but not limited to translations, adaptations, or variations.
- Users should provide proper attribution when sharing or displaying finished products made using these pattern instructions, giving credit to the original pattern creator and source.
- Users are expected to conduct themselves in an ethical and respectful manner when using pattern instructions. Users should not engage in plagiarism, claim others’ work as their own, or misrepresent the origin of pattern instructions.
By accessing and using pattern instructions, individuals agree to abide by the usage policy herein. Users may be held responsible for any damages or legal liabilities result
Click Here to purchase a downloadable PDF version of this pattern!
Everything you need to make the Frosted Tote Bag crochet pattern:
YARN
Knit Picks Dishie, worsted weight #4 yarn (100% Cotton; 190 yds/173 m per 3.5 oz/100 g skein):
- Kenai x 1 skein
- Verdigris x 1 skein
- Swan x 1 skein
- Check for yarn substitutes!
HOOK & OTHER MATERIALS
- US Size I/9 5.5 mm Crochet Hook
- Yarn Needle
- For cord (optional):
- 2.5” Cardboard Square
- 1.5” Lobster Clasp
- 2 large hole beads (.25” hole)
GAUGE
- 6 pattern rows = 4”
- 20 pattern Sts = 4”
SIZES/FINISHED MEASUREMENTS
Without handles
- 22” around x 13” tall
- 26” around x 15” tall
STITCH KEY
- Ch(s) = chain(s)
- Sc = single crochet
- Dc = double crochet
- Sl St = slip stitch
- St(s) = stitch(es)
SPECIALTY STITCHES / TECHNIQUES
- Adjustable Loop
- Bobble (3 Dc Bobble) = [yarn over, insert hook into 1 space, yarn over, pull up loop, yarn over, pull through 2 loops on hook] 3 times, yarn over, pull through all 4 loops on hook.
NOTES:
- Tote is worked in parts: Base (joined rounds), Panels (rows), Handles (joined rounds)
- Change color as desired (if desired).
- To mimic example (all sizes):
- Color A = Round 1-9,
- Color B = Round 10-12,
- Color C = Remainder of Tote
- Decorative cord is optional, and worked separately.
Step-by-step instructions for the Frosted Tote Bag Crochet Pattern:
Base (all sizes)
Check out our Crochet Memberships for all skill levels!
From First Stitch to Crochet Career, Unravel Your Complete Journey With The American Crochet Association!
Round 1 (Right Side): Form adjustable loop, Ch 2 (not a St, here and throughout), [Bobble, Ch 3] 6 times, Sl St into first Ch-3 space to join – 6 Bobble + 6 Ch-3 spaces
Round 2: Ch 2, [(Bobble, Ch 3, Bobble) into Ch-3 space, Ch 3] 6 times, Sl St into first Ch-3 space to join – 12 Bobble + 12 Ch-3 spaces
Round 3: Ch 2, [(Bobble, Ch 3, Bobble) in Ch-3 space, Ch 3, (Bobble, Ch 3) in next Ch-3 space] 6 times, Sl St into first Ch-3 space to join – 18 Bobble + 18 Ch-3 spaces
Round 4: Ch 2, [(Bobble, Ch 3, Bobble) in Ch-3 space, Ch 3, (Bobble, Ch 3) in next 2 Ch-3 spaces] 6 times, Sl St into first Ch-3 space to join – 24 Bobble + 24 Ch-3 spaces
Round 5: Ch 2, [(Bobble, Ch 3, Bobble) in Ch-3 space, Ch 3, (Bobble, Ch 3) in next 3 Ch-3 spaces] 6 times, Sl St into first Ch-3 space to join – 30 Bobble + 30 Ch-3 spaces
Continue with instructions for specified size.
22” Base
Round 6: Ch 2, (Bobble, Ch 3) into each Ch-3 space around, Sl St into first Ch-3 space to join – 30 Bobble + 30 Ch-3 spaces
Repeat round 6 until 13 rounds complete, continue to Panels.
22” Panels
Row 1 (Right Side: Ch 3 (first Dc, here and throughout), (Bobble, Ch 3) in each of next 12 Ch-3 spaces, Bobble into next Ch-3 space, Dc into next Ch-3 space – 13 Bobble + 12 Ch-3 spaces + 2 Dc
Row 2: Ch 3, turn, (Bobble, Ch 3) in each of next 11 Ch-3 spaces, Bobble into next Ch-3 space, Dc into Dc – 12 Bobble + 11 Ch-3 spaces + 2 Dc
Row 3: Ch 3, turn, (Bobble, Ch 3) in each of next 10 Ch-3 spaces, Bobble into next Ch-3 space, Dc into Dc – 11 Bobble + 10 Ch-3 spaces + 2 Dc
Row 4: Ch 3, turn, (Bobble, Ch 3) in each of next 9 Ch-3 spaces, Bobble into next Ch-3 space, Dc into Dc – 10 Bobble + 9 Ch-3 spaces + 2 Dc
Row 5: Ch 3, turn, (Bobble, Ch 1) in each of next 8 Ch-3 spaces, Bobble into next Ch-3 space, Dc into Dc – 9 Bobble + 8 Ch-1 spaces + 2 Dc
Fasten off after Row 5 for Panel 1. Attach yarn into 1st empty Ch-3 space of Base Round 13. Repeat Panel Rows 1-5. Do not fasten off, continue to Handles.
26” Base
Round 6: Ch 2, [(Bobble, Ch 3, Bobble) in Ch-3 space, Ch 3, (Bobble, Ch 3) in next 4 Ch-3 spaces] 6 times, Sl St into first Ch-3 space to join – 36 Bobble + 36 Ch-3 spaces
Round 7: Ch 2, (Bobble, Ch 3) into each Ch-3 space around, Sl St into first Ch-3 space to join – 36 Bobble + 36 Ch-3 spaces
Repeat round 7 until 16 rounds complete, continue to Panels.
26” Panels
Row 1 (Right Side): Ch 3 (first Dc, here and throughout), (Bobble, Ch 3) in each of next 15 Ch-3 space, Bobble into next Ch-3 space, Dc into next Ch-3 space – 16 Bobble + 15 Ch-3 spaces + 2 Dc
Row 2: Ch 3, turn, (Bobble, Ch 3) in each of next 14 Ch-3 spaces, Bobble into next Ch-3 space, Dc into Dc – 15 Bobble + 14 Ch-3 spaces + 2 Dc
Row 3: Ch 3, turn, (Bobble, Ch 3) in each of next 13 Ch-3 spaces, Bobble into next Ch-3 space, Dc into Dc – 14 Bobble + 13 Ch-3 spaces + 2 Dc
Row 4: Ch 3, turn, (Bobble, Ch 3) in each of next 12 Ch-3 space, Bobble into next Ch-3 spac, Dc into Dc – 13 Bobble + 12 Ch-3 spaces + 2 Dc
Row 5: Ch 3, turn, (Bobble, Ch 1) in each of next 11 Ch-3 space, Bobble into next Ch-3 spaces, Dc into Dc – 12 Bobble + 11 Ch-1 spaces + 2 Dc
Fasten off after Row 5 for Panel 1. Attach yarn into 1st empty Ch-3 space of Base Round 13. Repeat Panel Rows 1-5. Do not fasten off, continue to Handles.
Handles (all sizes)
Round 1 (Right Side): Ch 1 (not a St, here and throughout), work 3 Sc into side of each Dc St across 2nd then 1st Panel, Ch 50 (first handle), skip last row of 1st Panel, work 3 Sc into side of each Dc St across 1st then 2nd Panel, Ch 50 (second handle), Sl St into top of first Sc to join – 160 Sts; 60 Sc + 100 Ch
Round 2-3: Ch 1, work 1 Sc into each St around, Sl st into top of first Sc to join – 160 Sc
Round 4: Work 1 Sl St into each St around, fasten off – 160 Sl Sts
Cord (all sizes)
Row 1: Leave 6” tail, Ch 51, remove hook to expose loop, insert Lobster Clasp onto loop, insert hook into loop, skip 1 Ch (not a St), Sl St into next 14 Chs, Ch 5, skip 5 Ch, Sl St into remaining Chs across, fasten off 6” tail – 50 Sts; 45 Sl St + 5 Ch
Thread Beads through 6” tail ends and Cord (before Tassel is added).
Cord Tassel
- Wrap yarn around 2” cardboard 40 times, cut on one end (40 strands = 1 Bundle).
- Use 6” strands of yarn from end of Cord to evenly knot bundle into place.
- Cut 20” strand of yarn; wrap around Bundle 1” below cord. Knot, tuck ends into Bundle.
- Trim tassel ends to even, as desired.
Finishing (all sizes)
- Sew in ends, trim excess.
Click Here to share your finished project in our community!
Peace + Love + Crochet
Salena

Looks great! Is this bag lined?
I’m so glad you like it! No, I typically do not line my crochet bags.