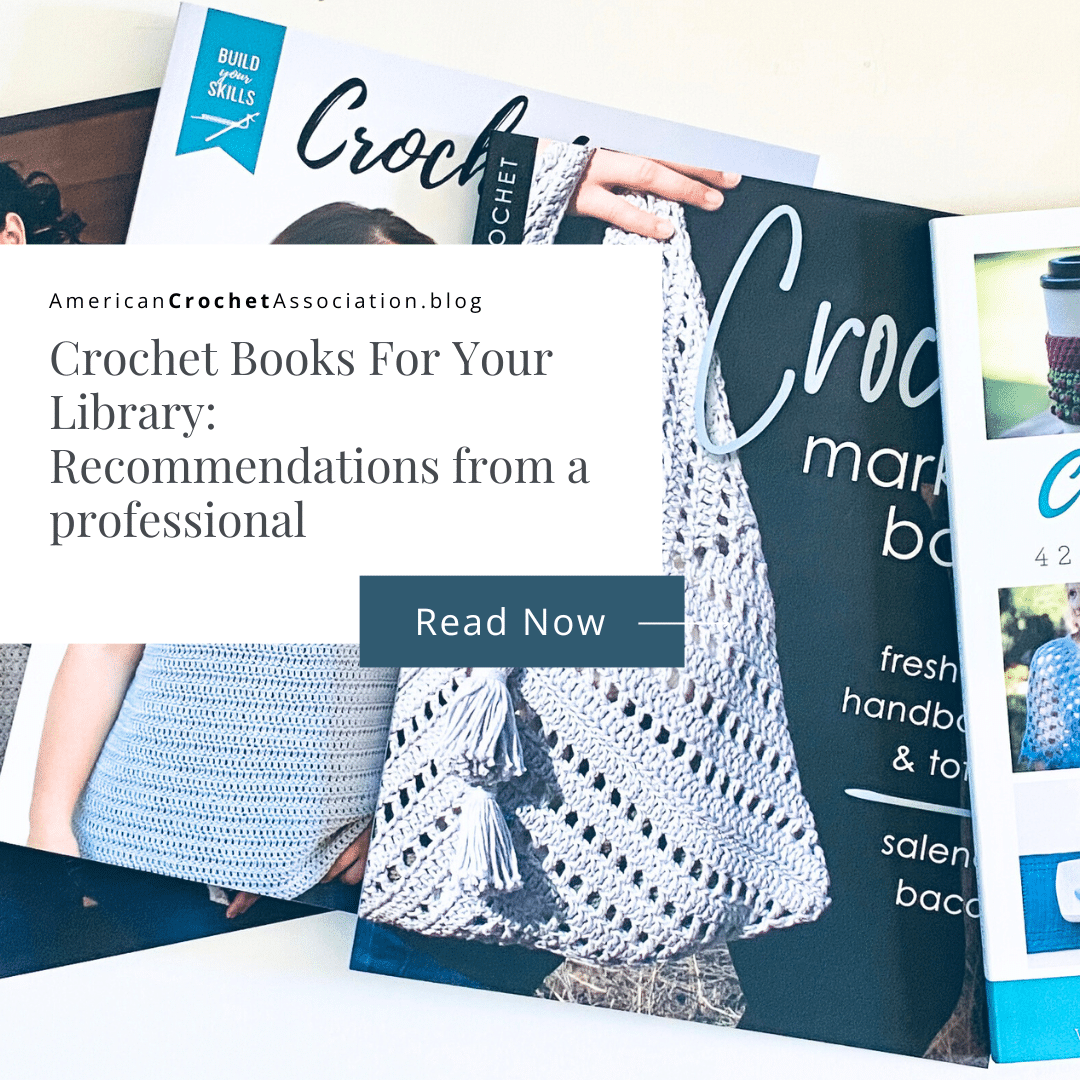
Affiliate Disclosure: This post may contain affiliate links, which means the American Crochet Association may earn a small commission from qualifying purchases made through links on our site, at no additional cost to you. Learn more on our Disclosures and Disclaimers page.
If you’re only taking pictures to track the projects you crochet, you’re seriously missing out on fully documenting all of your hard work!
Whether crochet is just your hobby, or you make things to sell, having a record of each item you crochet can be a really helpful resource.
If you’re new to Ravelry, or have not yet used it fully, I’ll show you how to add a project because it is one of the best features available.
Imagine keeping track of every project you’ve ever crocheted…
- Linking it directly to the pattern you followed
- Knowing exactly what yarn brand, type, fiber and color you used (and the total yardage or skeins required)
- Knowing what hook you used
- Seeing your start and finish date
- Finding any notes you made (including alterations and revisions)
- All the pictures of your finished project
- Seeing other finished projects of the same design by crocheters around the world
Amazing, right?
And, if you’re thinking that the notebook you scribble into while you crochet is documentation enough, think again…
Even though I keep lots of notebooks and notecards to track what’s only my hook, it’s really hard to sift through all that in the future to find things like older creations, alterations to designs, or even what yarn and hook I might have used to finish a project.
That’s why I always recommend adding crochet projects to Ravelry.
Table of contents
Estimated reading time: 7 minutes
What is Ravelry?
If you’re not already familiar with Ravelry.com, here are some things to note:
- It’s a free social networking service and website just for yarn lovers (knitting, crochet, spinning, weaving…) that’s been around since 2007.
- It functions as a database for all things crochet and yarn (yarn, people, patterns, tools, projects).
- Once you join, you can build your very own (virtual) notebook to track the crochet things that matter to you the most: projects, yarns, tools, patterns, people and more!
No, Ravelry is not sponsoring me in any way, and they haven’t asked me to say anything on their behalf.
I created my free Ravelry account in October 2009 (Raveler #481347), and I’m constantly in awe of all the new features I find.
For example, I was on Ravelry for over four years before I learned I could use my notebook to document all my crochet projects – mind blown.
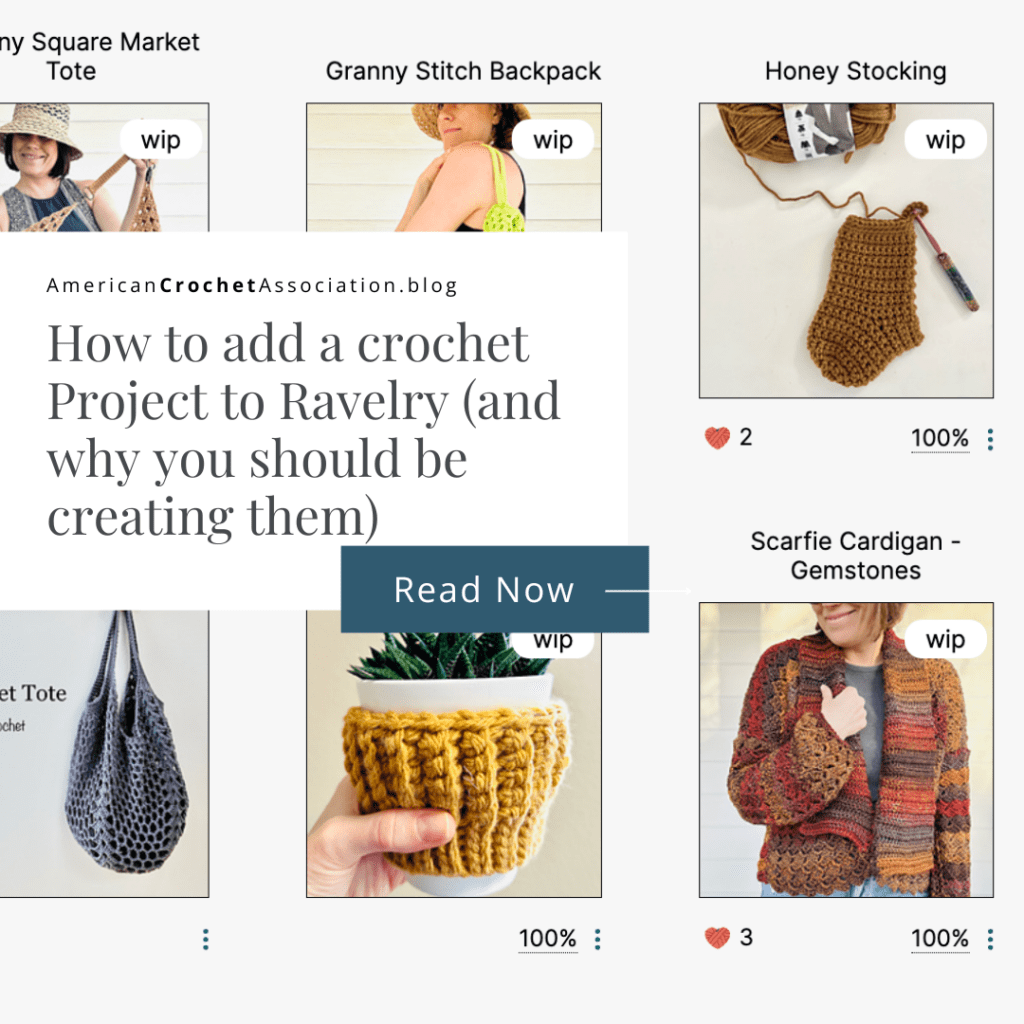
What is a Ravelry Project?
Remember, when you join Ravelry by creating a free account, you can build your very own virtual database of all things crochet: make an inventory of your yarn and hooks, find patterns, connect with other crocheters, and catalog all of the projects you create.
On Ravelry, you can document, organize and share any crochet project you create in your own virtual notebook, whether you finish them or not…
Yep, they can stay WIPs forever – no judgment!
Need an example?
Check out our Crochet Memberships for all skill levels!
From First Stitch to Crochet Career, Unravel Your Complete Journey With The American Crochet Association!
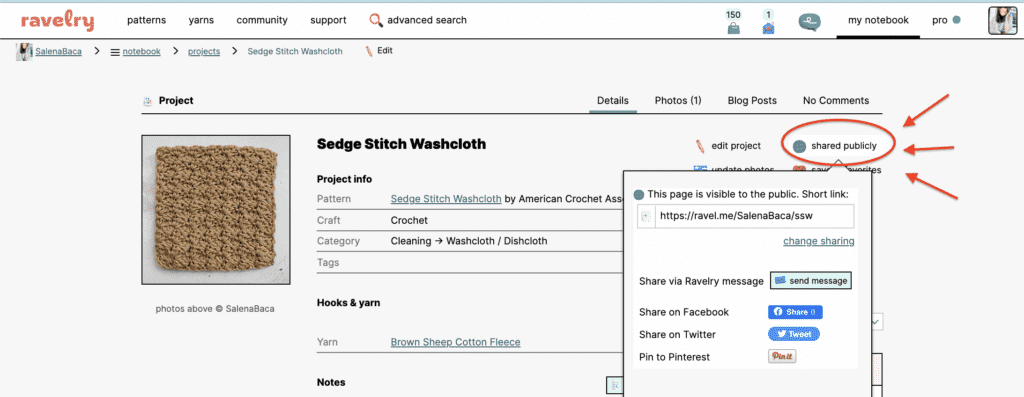
Here’s a project I created for the Sedge Stitch Washcloth:
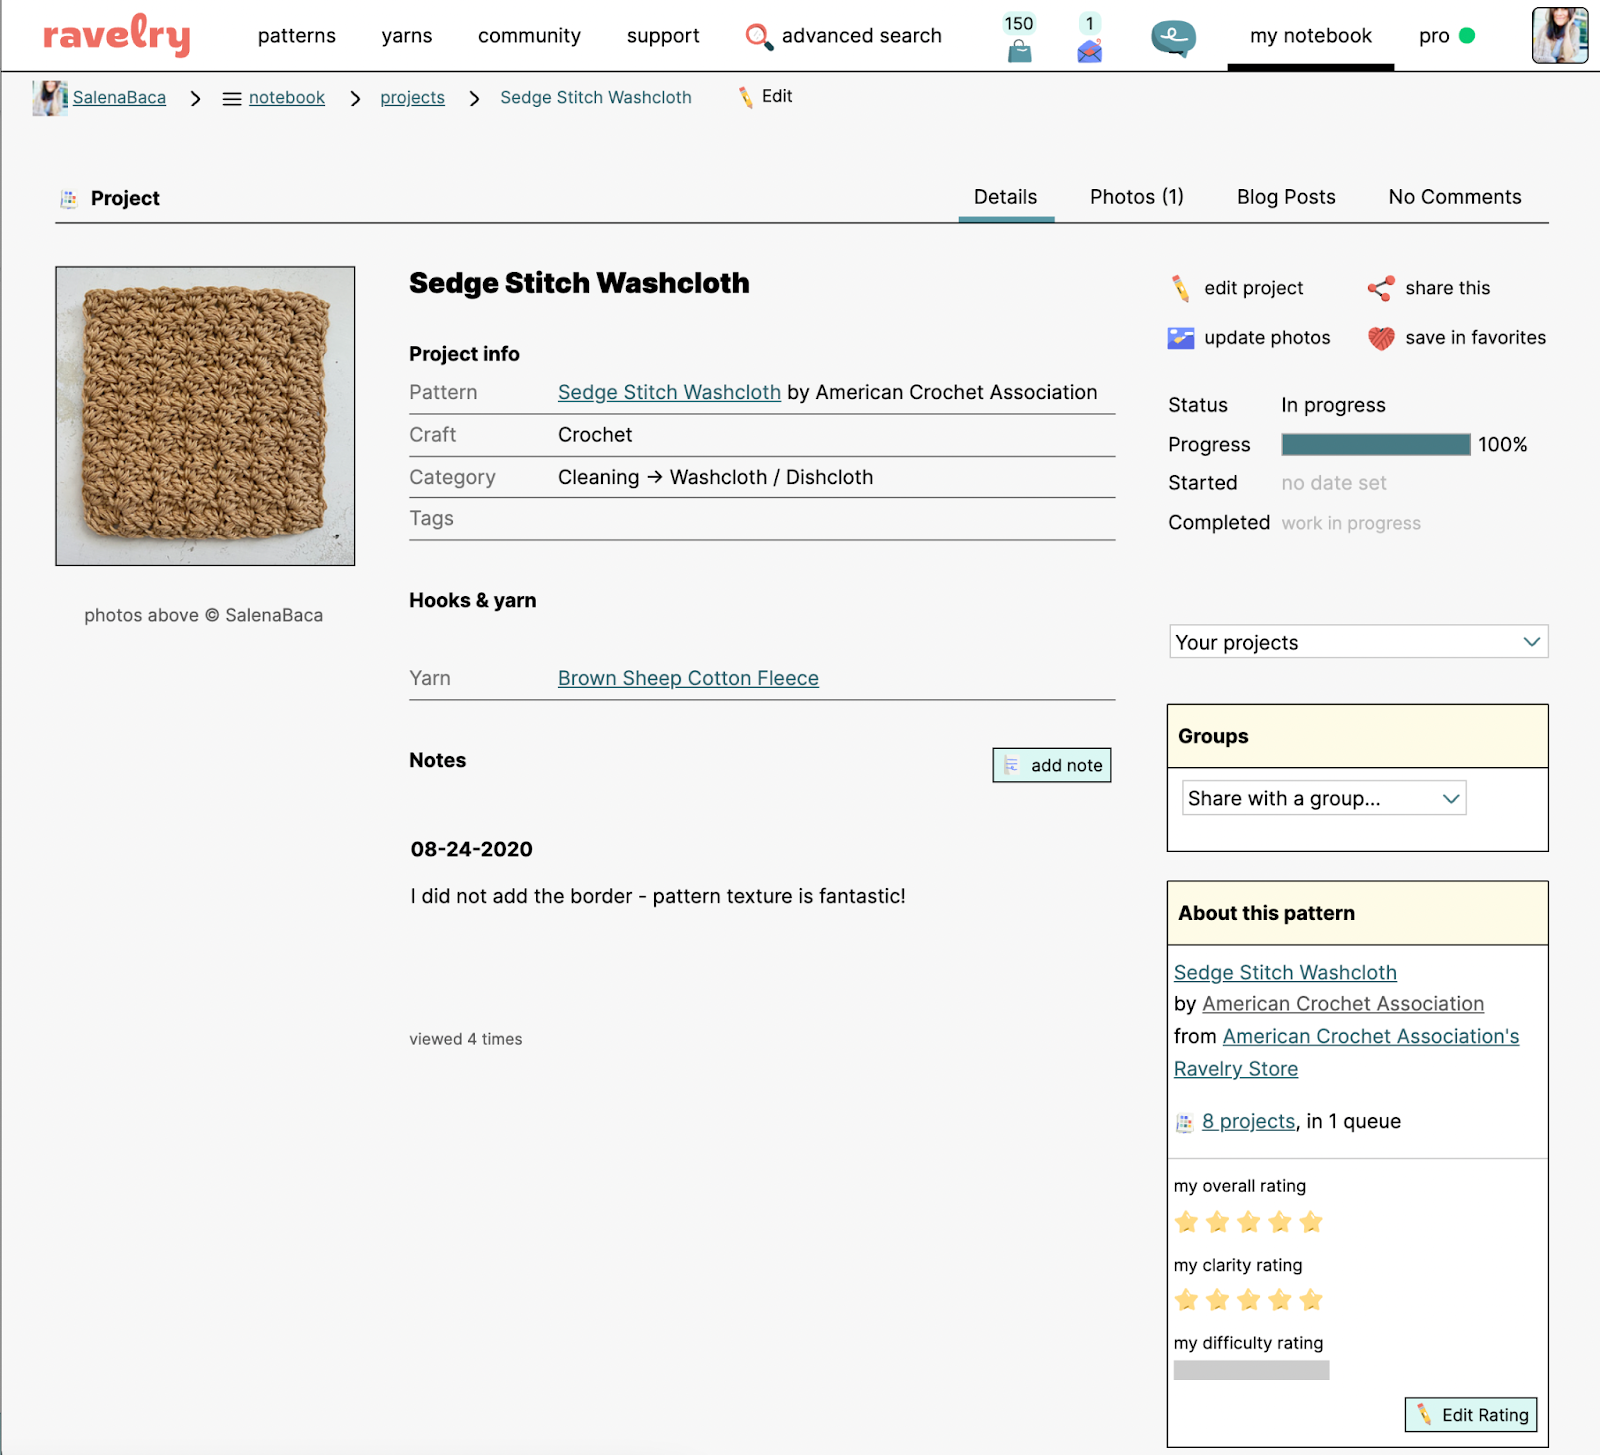
Some of the highlights in documenting a project like this include:
- Pattern name and direct link
- Hook & yarn used
- Notes & alterations
- Status (progress, start & completion date)
- Pattern details (author, additional projects)
- And, pictures!
The blue underlined text represents links you can click on to find more information. From this project I can directly find the original pattern, pattern author, yarn, and projects posted for this pattern by other crocheters!
Now, are you ready to start a virtual catalog of your own crochet projects?
How can I create a Ravelry Project?
Before you get started…
- Watch my quick video tutorial as I add a project!
- Try using Ravelry from a device with a large screen (like a desktop, laptop or tablet), so you can see more options and prompts.
- Find a project you’ve already finished to follow along with my steps, and create your first Ravelry project!
Let’s get started…
While there are a few ways you can add projects to Ravelry, here’s one simple way:
- Log into Ravelry.
- Look for the “my notebook” menu at the top of the screen. Click it!
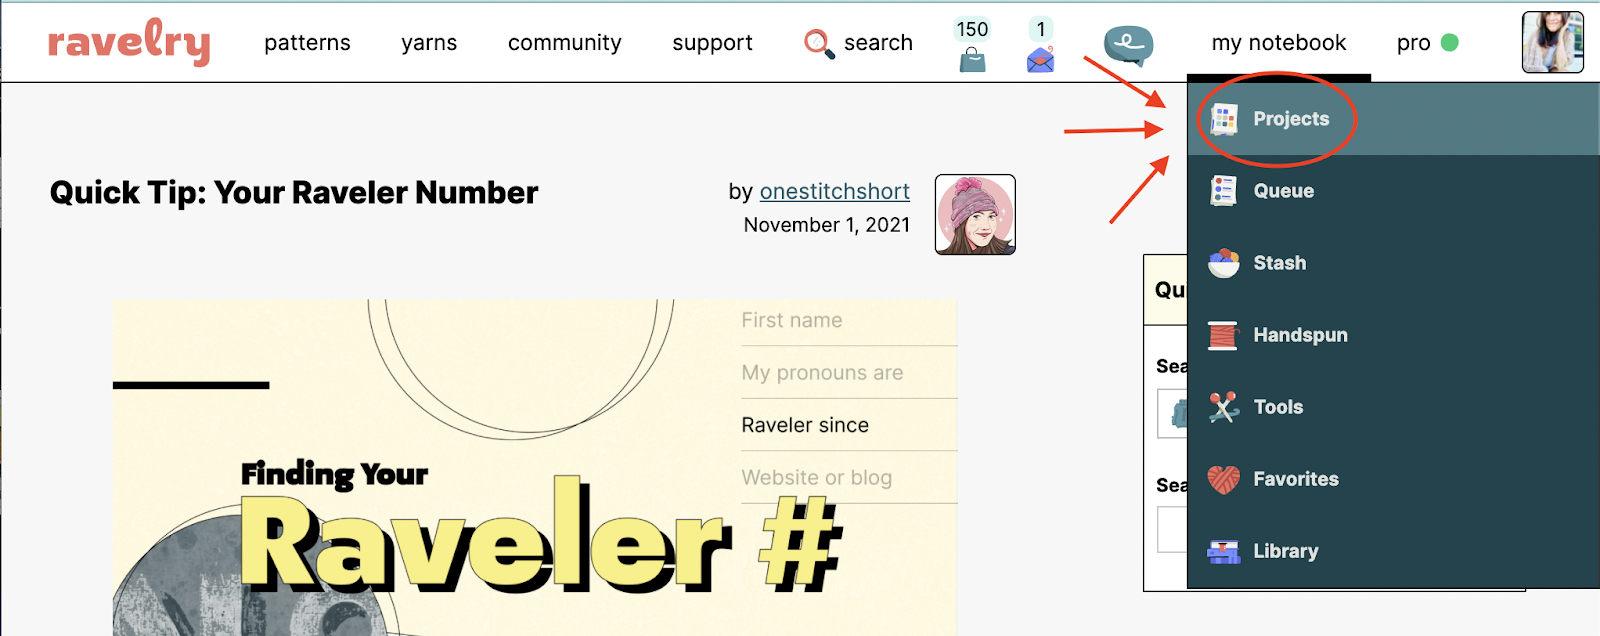
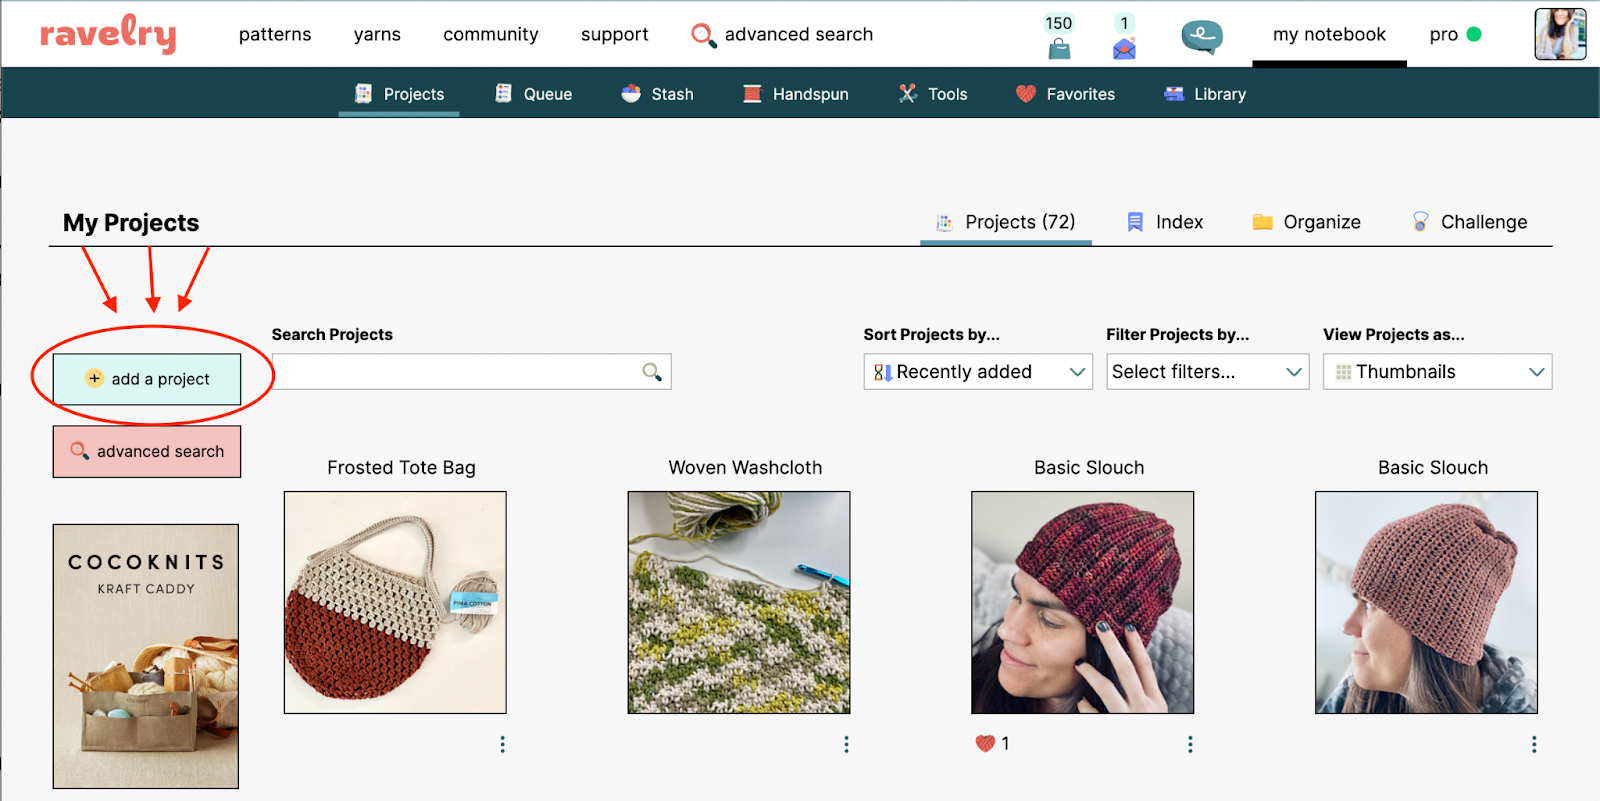
- Look for the “add a project” button. Click it!
- Link & Name your project:
- Which Craft? You can choose from crochet, knitting and more!
- Name your project. This can be any name of your choosing, like “Susan’s Baby Shower Gift 2022”.
- Now you can choose one of 3 options to help link your project to the pattern on Ravelry. After you choose one, click “continue”:
- I used a pattern (enter the exact pattern name, as listed on Ravelry)
- I didn’t use a pattern (you freeform with your own brain),
- The pattern that I used is not in Ravelry (only check this box if you’ve already searched through all patterns)
- Link your project: If you choose the “I used a pattern” option above, find the exact pattern listing from the list (there might be more than one to choose from). When you find the pattern, click “choose this pattern”.
- Project page: By now you’ve reached your project page, and it might overwhelm you at first – don’t be scared! This page can be updated anytime, and you can add as much information as you want. You don’t have to have to complete all the project details, but here are some important details you can start with:
- Add a photo: As many as you need!
- Size made: This is especially important if a pattern has multiple sizes.
- Pattern category: Clothing, accessories, home, toys…
- Hooks: What size did you use
- Yarns: Link the exact brand, type, color and total yardage
- Project notes: Any details that will help you with the pattern, or notes about how you altered / revised / completed the project.
- Started: The date you started the project.
- Completed: The date you completed the project.
- Don’t forget to click “save changes” at the bottom of the screen
Follow the prompts to add as much (or as little) information about your project as you want! Remember, these can be revised and updated anytime.
What do I do once I add Ravelry projects?
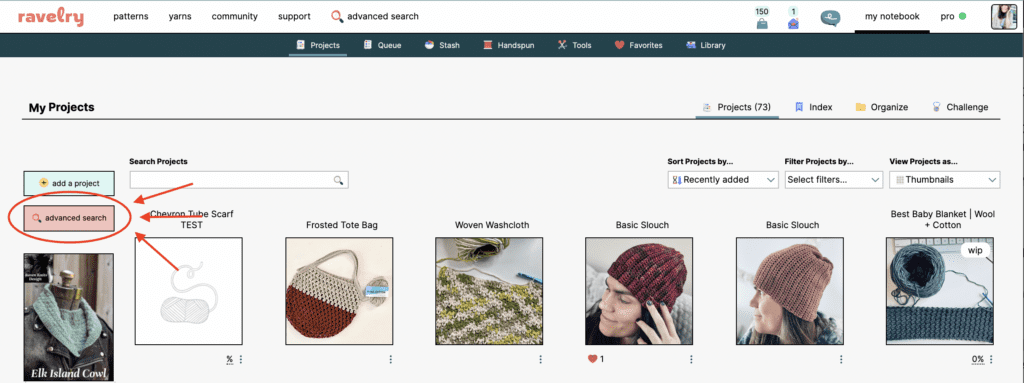
To find the projects you’ve added, simply click on “my notebook” then “projects” in the top menu.
From there, you can run two types of searches:
- Advanced Search: Click the “advanced search” box to filter through all your projects by specific types of criteria (example: pattern category, yarn weight)
- Quick Search: Enter a key term or word in the “search projects” box with the spyglass (example: hat, lion brand yarn)
When you want to share a project with someone else who has access to Ravelry, you can copy and paste the URL of the project page to share it.
Or, click “share this” in the upper right corner to share a project directly with another Ravelry user, or update the settings to share it with others (access with a link, or make your project visible to the public).
Once you get started, the process is quick and easy! And if you’ll be giving this a try, let me know in the comments.
Video Tutorial
For even more details on this subject, watch my video chat right here:
Click Here to share your latest finished project in our community!
Peace, Love & Crochet
Salena