Affiliate Disclosure: This post may contain affiliate links, which means the American Crochet Association may earn a small commission from qualifying purchases made through links on our site, at no additional cost to you. Learn more on our Disclosures and Disclaimers page.
If you’ve ever tried a crochet circle pattern but ended up with something that looks more like a bowl… or a ruffle… Here’s the good news: there’s a simple formula that fixes that.
Learning how to crochet a flat circle might seem easy, but there’s a little math (and a clear method) behind getting it right every time.
In this guide, I’ll break down the formula in a way that actually makes sense, so you know exactly what to do (and why it works).
You’ll learn how to crochet a circle step-by-step, understand the purpose behind each increase, and feel confident working in the round with single, half double, and double crochet stitches—without second-guessing yourself.
We’ll go through how to create flat, even circles with each stitch type, so you can see how they behave.
And because I’m not about to leave you with just the “why,” you’ll also get step-by-step free patterns for a:
- single crochet circle
- half double crochet circle
- double crochet circle
- triple (treble) crochet circle
By the end, you won’t just be following a pattern—you’ll understand how to create your own.
And that’s where the real magic happens.
Table of contents
Estimated reading time: 9 minutes
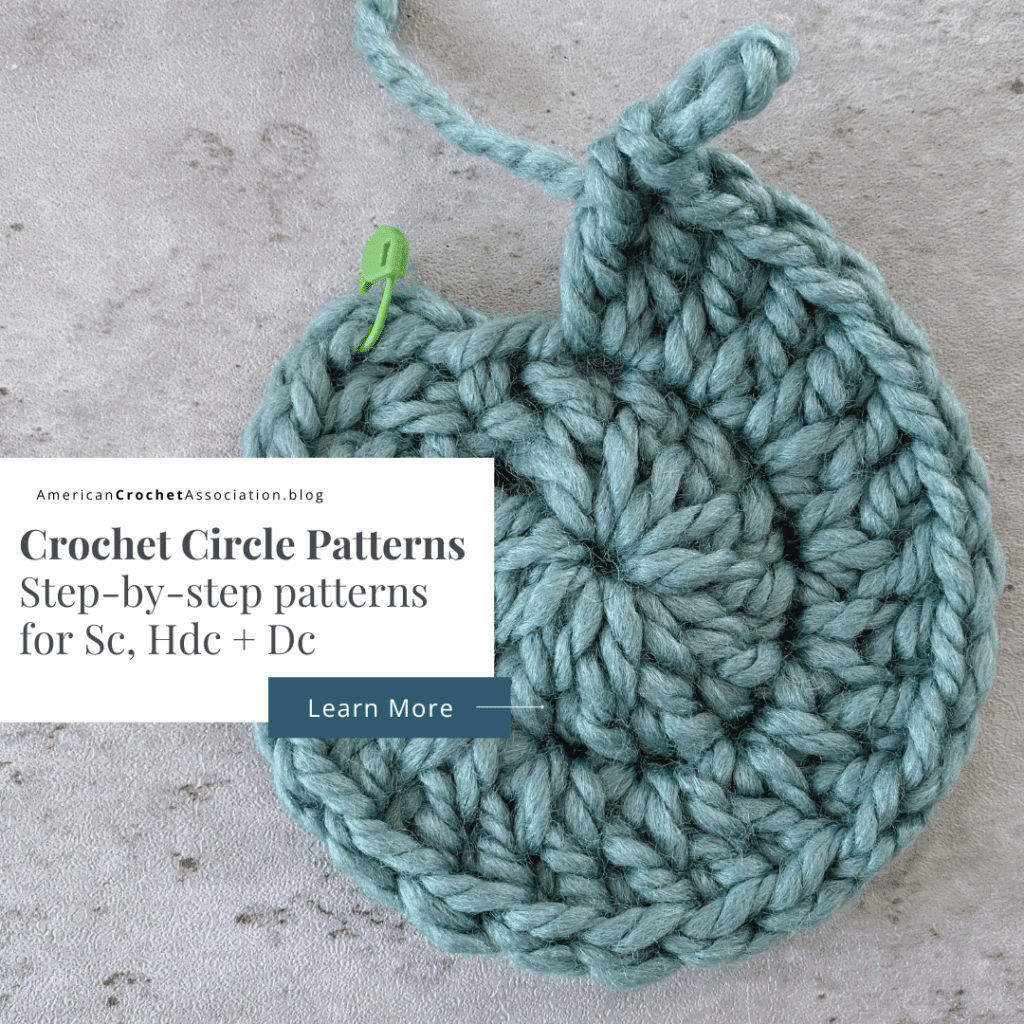
How to Crochet a Flat Circle
When you’re learning how to crochet a circle, the goal is usually the same: you want it to lay flat.
No curling into a bowl, no ruffling like a frilly edge—just a smooth, even circle.
A crochet circle pattern works by starting at the center and building outward in rounds.
To keep that circle flat, each round must include evenly spaced increases.
And here’s the part most people don’t realize at first: There’s a simple formula behind it—and it changes depending on your stitch.
The Basic Formula for Flat Crochet Circles
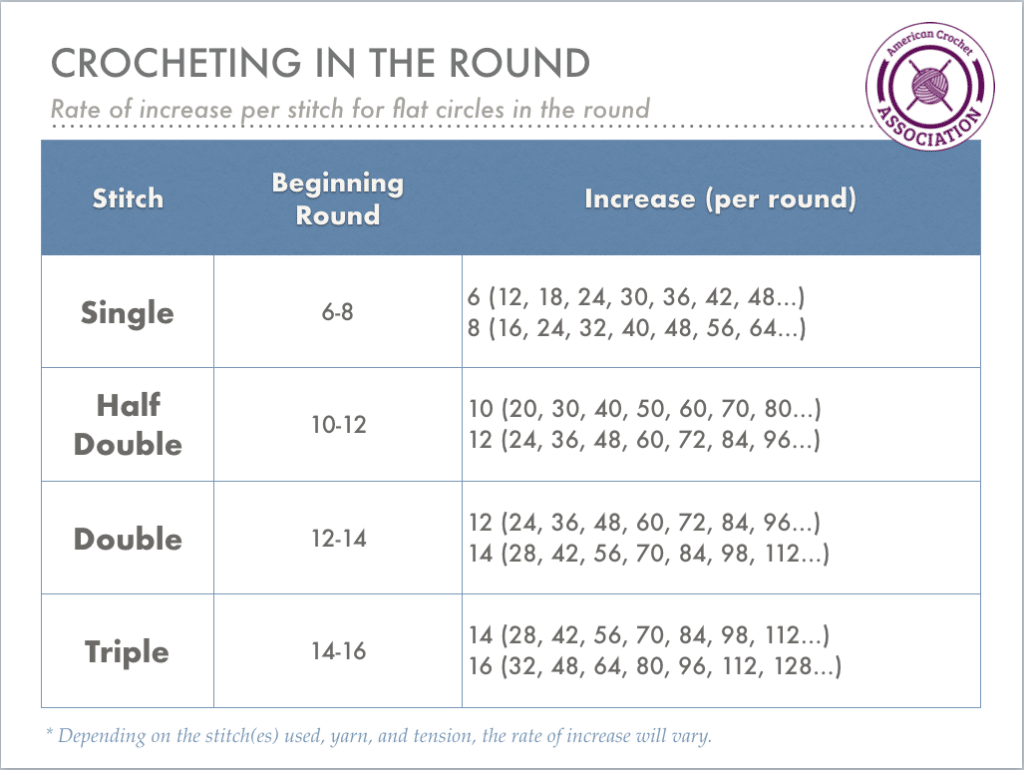
Each stitch height requires a different starting number and increase rate.
If you follow the right formula, your circle will naturally stay flat.
- Single Crochet Circle (SC): Start with 6–8 stitches, then increase by 6–8 stitches in every round.
- Half Double Crochet Circle (HDC): Start with 10–12 stitches, then increase by 10–12 stitches in every round.
- Double Crochet Circle (DC): Start with 12–14 stitches, then increase by 12–14 stitches in every round.
This is what creates a flat, even circle when working crochet in the round.
Here’s a helpful cheat sheet that shows the rate of increase per stitch for a flat, even crochet circle pattern for the single, half double, double, and triple crochet stitch.
Why Crochet Circles Curl or Ruffle
If your circle isn’t laying flat, it’s usually because the math is off:
- Too few stitches: your circle will tighten and curl into a bowl shape
- Too many stitches: your circle will stretch and start to ruffle or ripple
Once you understand this, you can fix almost any circle—or even create your own crochet circle pattern with confidence.
How to Start a Crochet Circle Pattern
There are a few different ways to begin a crochet circle, and the method you choose often depends on your project (or the pattern you’re following).
Common Ways to Start a Crochet Circle
- Magic Ring (Adjustable Loop): This is the most popular method because it creates a tightly closed center with no hole.
- Chain Loop: Chain a few stitches and join them to form a ring, then work your first round into that loop.
- Working Into a Chain: In some patterns, you’ll crochet directly into a starting chain rather than forming a ring.
All three methods can work beautifully, but if you’re following a specific crochet circle pattern, it’s always best to stick with the designer’s instructions for consistent results.
How to Join a Crochet Circle Pattern
When working crochet in the round, you have two main options: continuous rounds or joined rounds.
Each creates a slightly different look and function.
Check out our Crochet Memberships for all skill levels!
From First Stitch to Crochet Career, Unravel Your Complete Journey With The American Crochet Association!
Continuous Rounds (Spiral)
A continuous round means you keep crocheting without joining at the end of each round—you simply move into the next round in a spiral.
- No visible seam
- Ideal for projects like amigurumi
- Requires stitch markers to keep track of rounds
To create a smooth spiral from the beginning, your first round often builds from shorter to taller stitches, allowing the next stitches to stack naturally.
Here’s a video tutorial – How to crochet in continuous increasing rounds with single crochet
Joined Rounds
Joined rounds are completed by using a slip stitch to connect the last stitch of the round to the first.
- Creates a defined starting/ending point
- The slip stitch is a joining method (it usually does not count as a stitch)
- Common in garments, accessories, and flat pieces
This method can leave a subtle seam, but it also keeps your rounds clean and evenly stacked.
Here’s a video tutorial – How to crochet in joined rounds and increase with double crochet
Crochet Circle Patterns
No matter which method you choose, the most important thing is consistency round over round—and when in doubt, always follow your pattern.
Once you understand how to start, structure, and join your work, you’re not just learning how to crochet a flat circle—you’re building the skills to design your own with confidence.
Here are step-by-step stitch patterns to practice crochet circles with basic stitches:
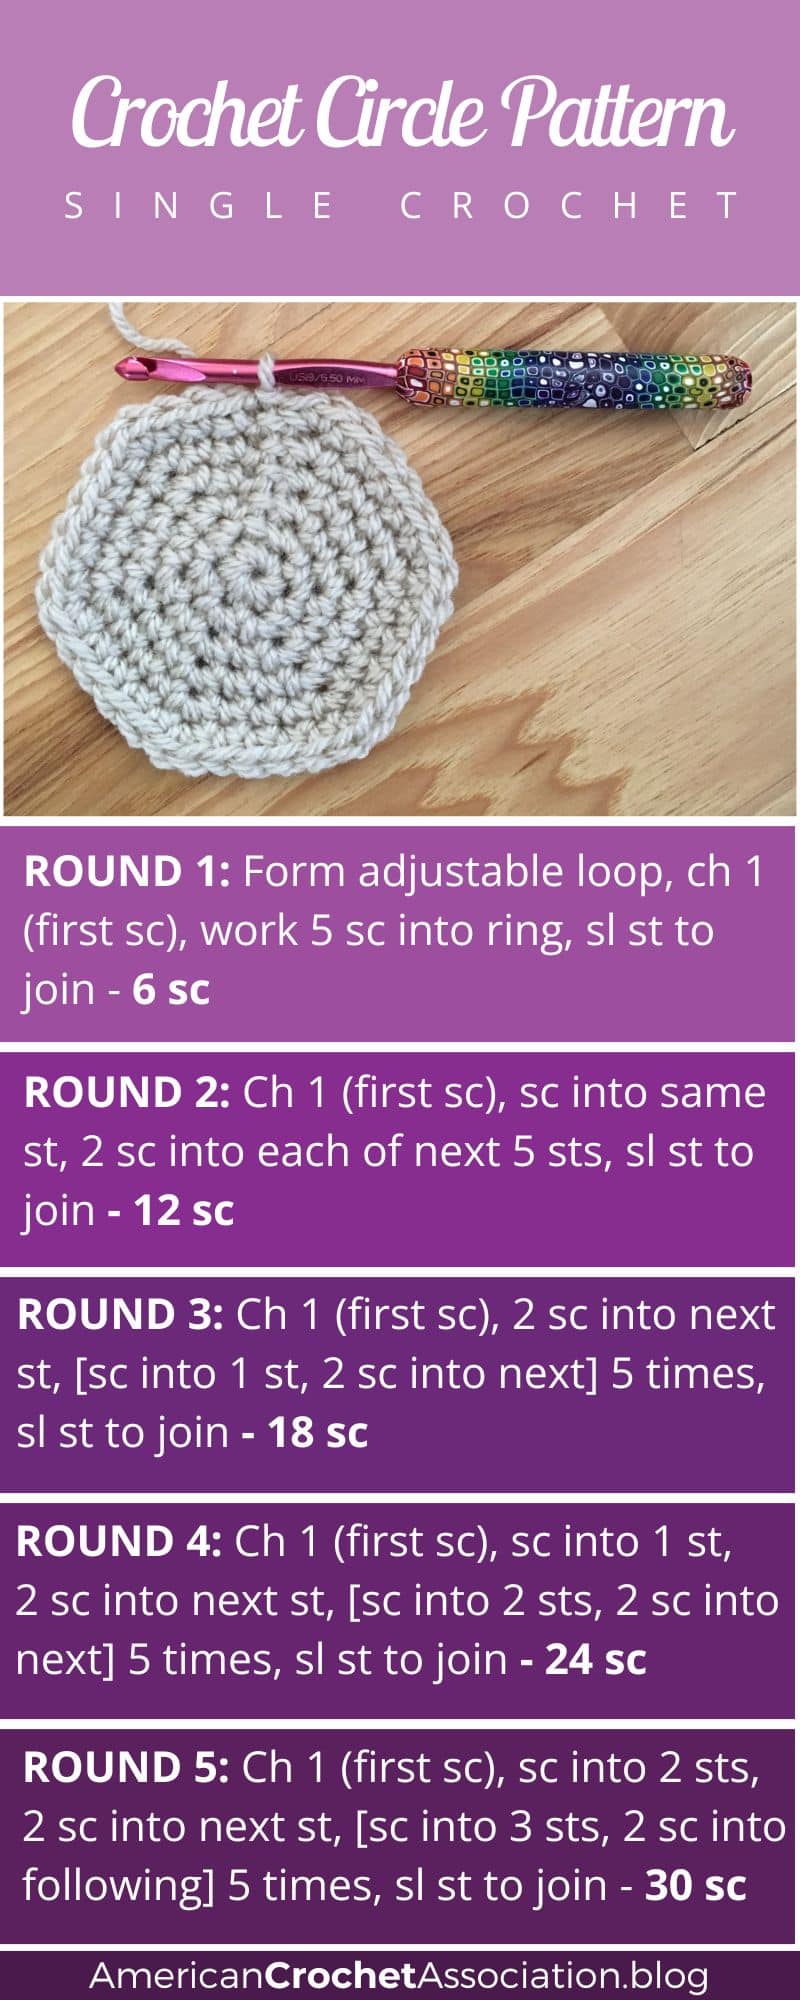
Single Crochet Circle Pattern
- Form an adjustable loop.
- Round 1 (Right Side): Ch 1 (first Sc, here and throughout), work 5 Sc into loop, Sl st to join – 6 Sc
- Round 2: Ch 1, Sc into same St, work 2 Sc into each St around, Sl St to join – 12 Sc
- Round 3: Ch 1, 2 Sc into next St, [Sc, work 2 Sc into next St] 5 times, Sl St to join – 18 Sc
- Round 4: Ch 1, Sc into next St, 2 Sc into next St, [Sc into next 2 Sts, 2 Sc into next St] 5 times, Sl St to join – 24 Sc
- Round 5: Ch 1, Sc into next 2 Sts, 2 Sc into next St, [Sc into next 3 Sts, 2 Sc into next St] 5 times, Sl St to join – 30 Sc
Continue the pattern by adding 6 stitches in each new round, spacing the increases evenly all the way around so your circle stays flat and balanced.
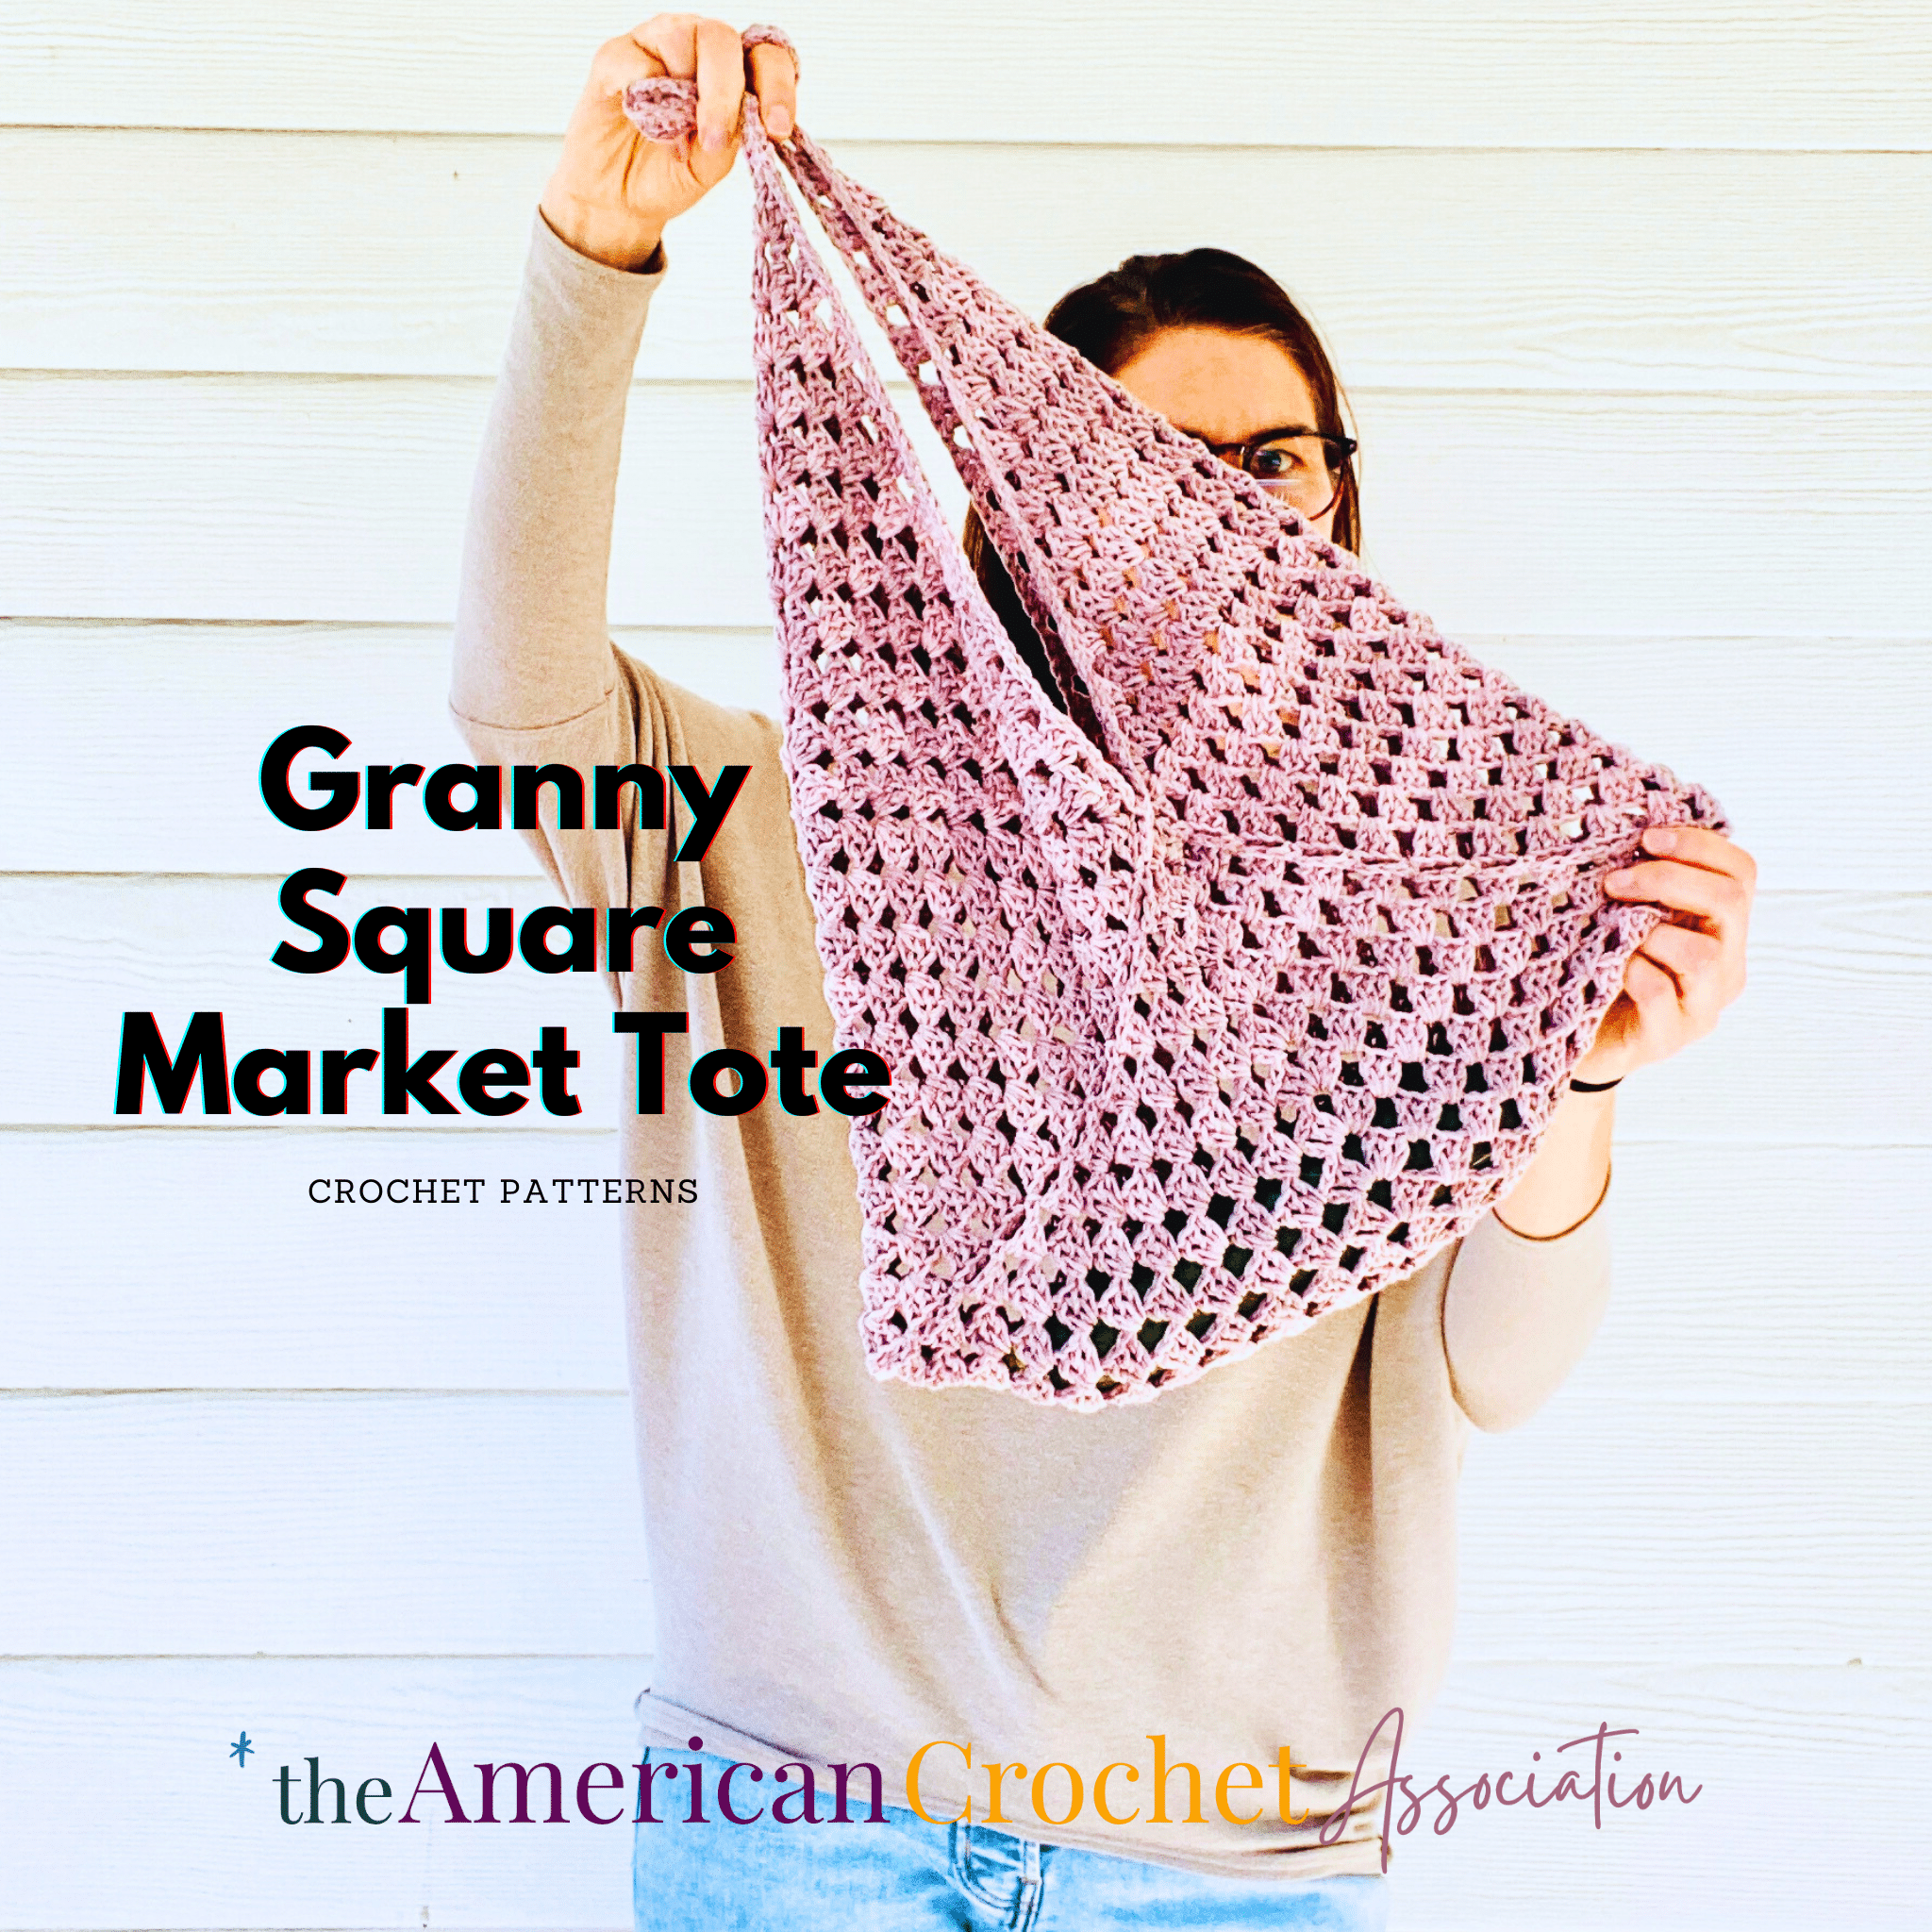
Use the Single Crochet to make this Basketweave Tote.
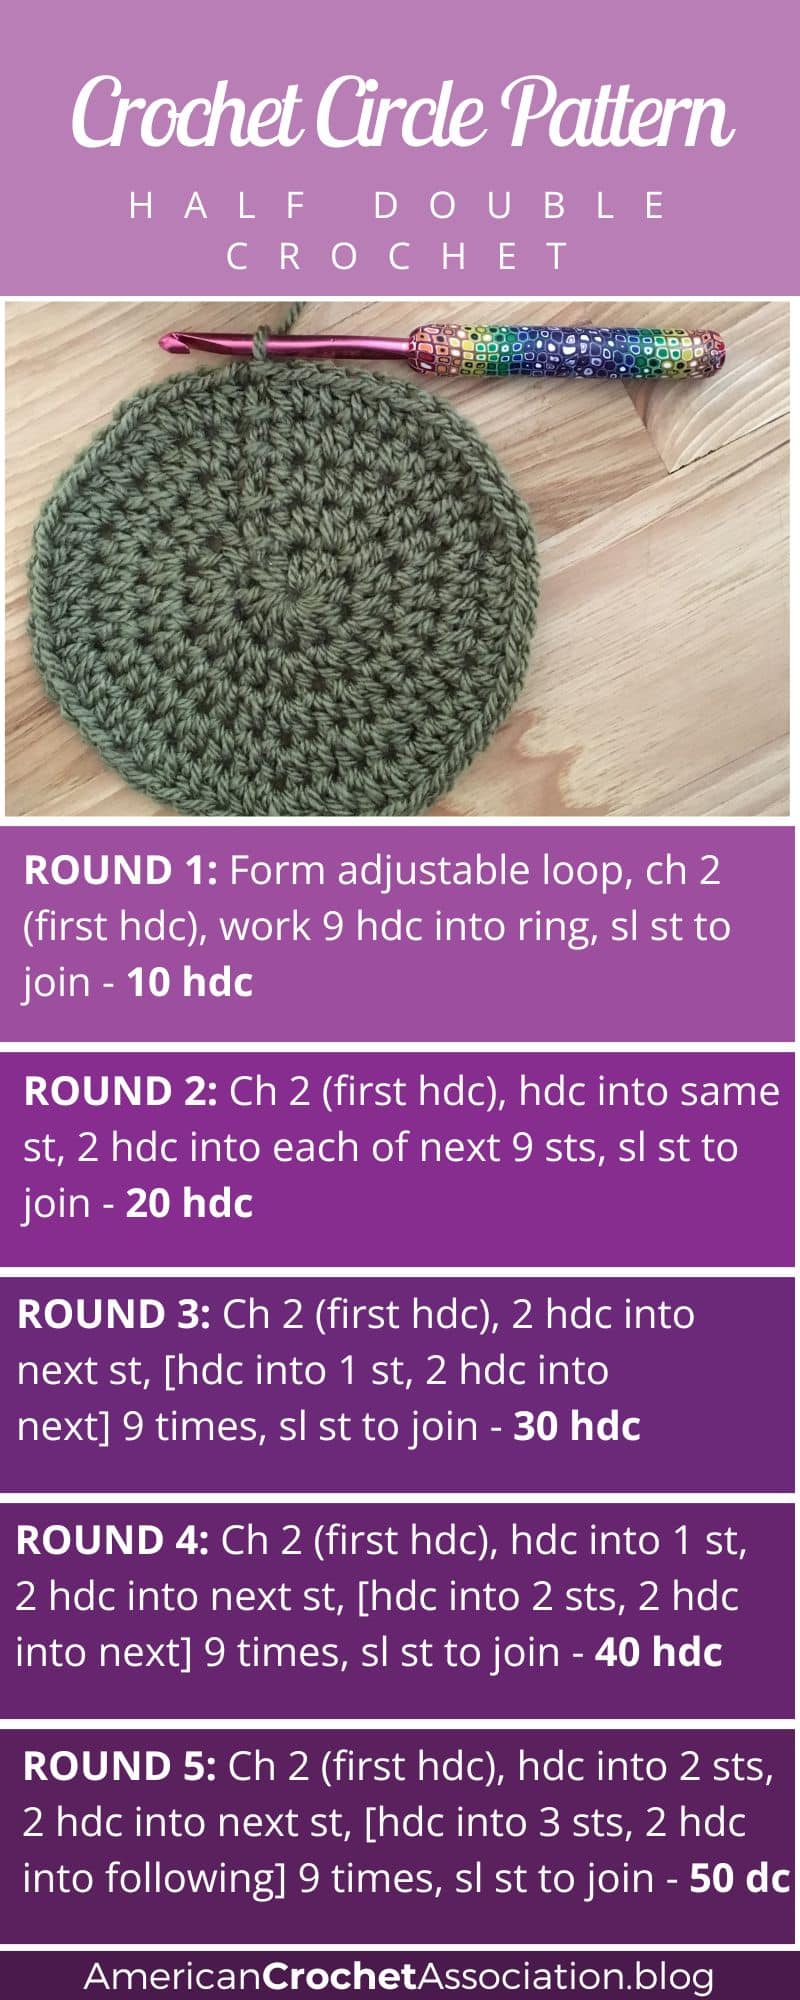
Half Double Crochet Circle Pattern
- Form an adjustable loop.
- Round 1 (Right Side): Ch 2 (first Hdc, here and throughout), work 9 Hdc into loop, Sl st to join – 10 Hdc
- Round 2: Ch 2, Hdc into same St, work 2 Hdc into each St around, Sl St to join – 20 Hdc
- Round 3: Ch 2, 2 Hdc into next St, [Hdc, work 2 Hdc into next St] 9 times, Sl St to join – 30 Hdc
- Round 4: Ch 2, Hdc into next St, 2 Hdc into next St, [Hdc into next 2 Sts, 2 Hdc into next St] 9 times, Sl St to join – 40 Hdc
- Round 5: Ch 2, Hdc into next 2 Sts, 2 Hdc into next St, [Hdc into next 3 Sts, 2 Hdc into next St] 9 times, Sl St to join – 50 Hdc
Continue the pattern by adding 10 stitches in each new round, spacing the increases evenly all the way around so your circle stays flat and balanced.
Use the Half Double Crochet to make this Easy Crochet Bag.
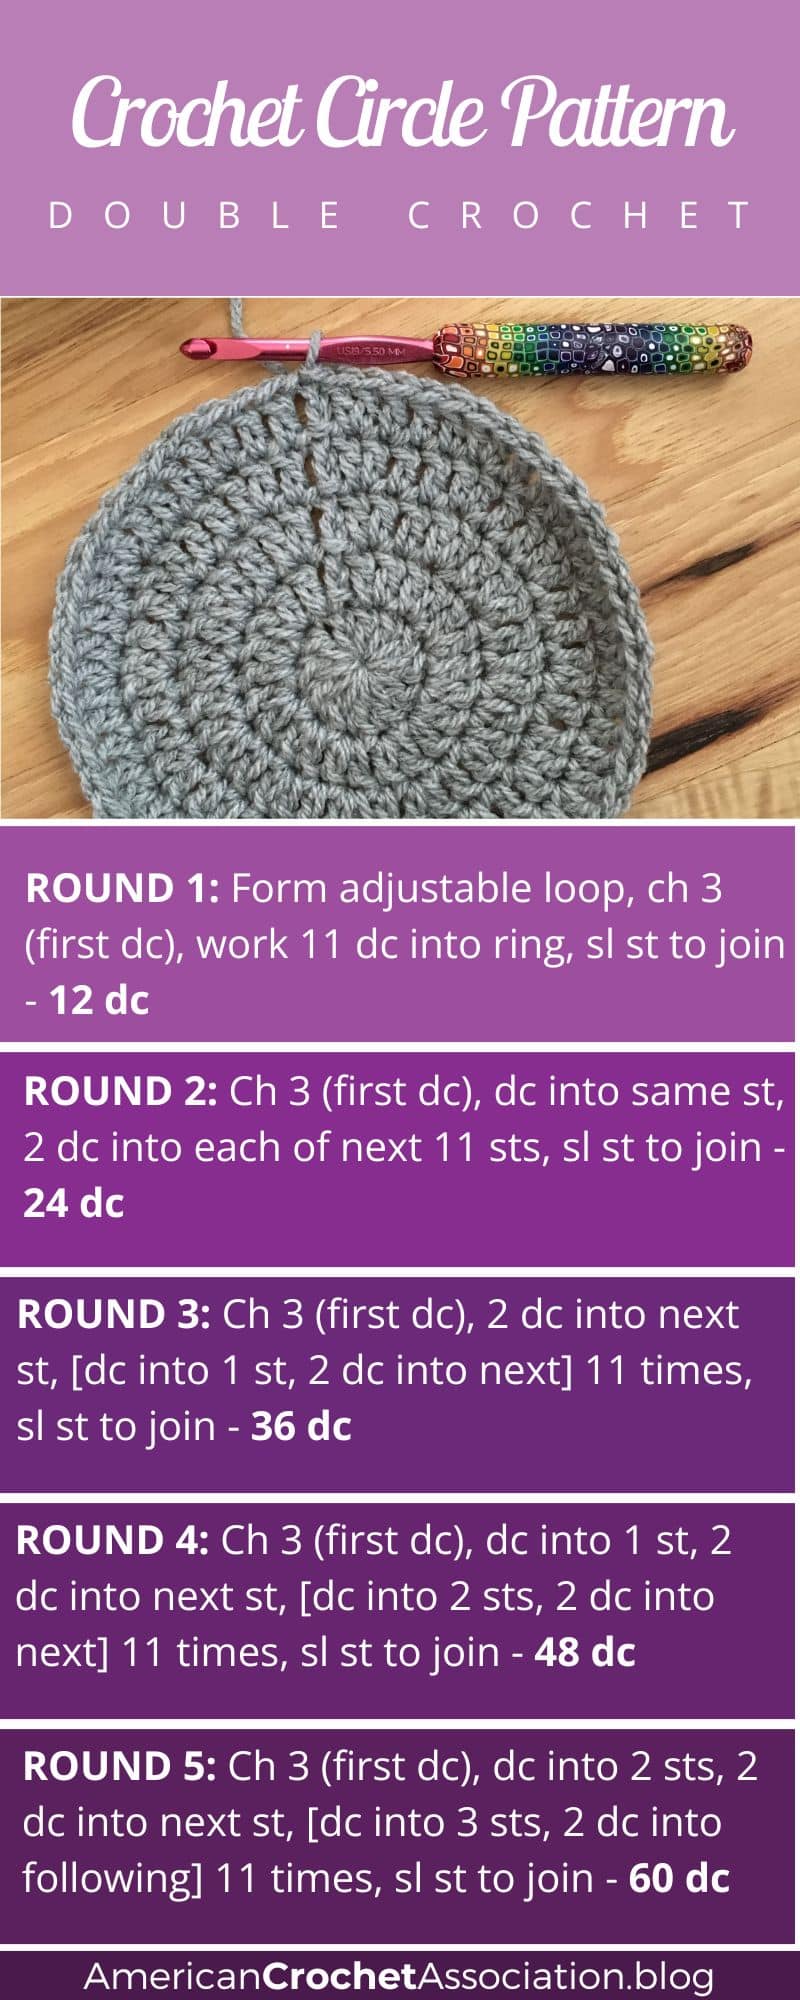
Double Crochet Circle Pattern
Form an adjustable loop.
- Round 1 (Right Side): Ch 3 (first Dc, here and throughout), work 11 Dc into loop, Sl st to join – 12 Dc
- Round 2: Ch 3, Dc into same St, work 2 Dc into each St around, Sl St to join – 24 Dc
- Round 3: Ch 3, 2 Dc into next St, [Dc, work 2 Dc into next St] 11 times, Sl St to join – 36 Dc
- Round 4: Ch 3, Dc into next St, 2 Dc into next St, [Dc into next 2 Sts, 2 Dc into next St] 11 times, Sl St to join – 48 Dc
- Round 5: Ch 3, Dc into next 2 Sts, 2 Dc into next St, [Dc into next 3 Sts, 2 Dc into next St] 11 times, Sl St to join – 60 Dc
Continue the pattern by adding 12 stitches in each new round, spacing the increases evenly all the way around so your circle stays flat and balanced.
Use the Double Crochet to make this Ombre Beanie.
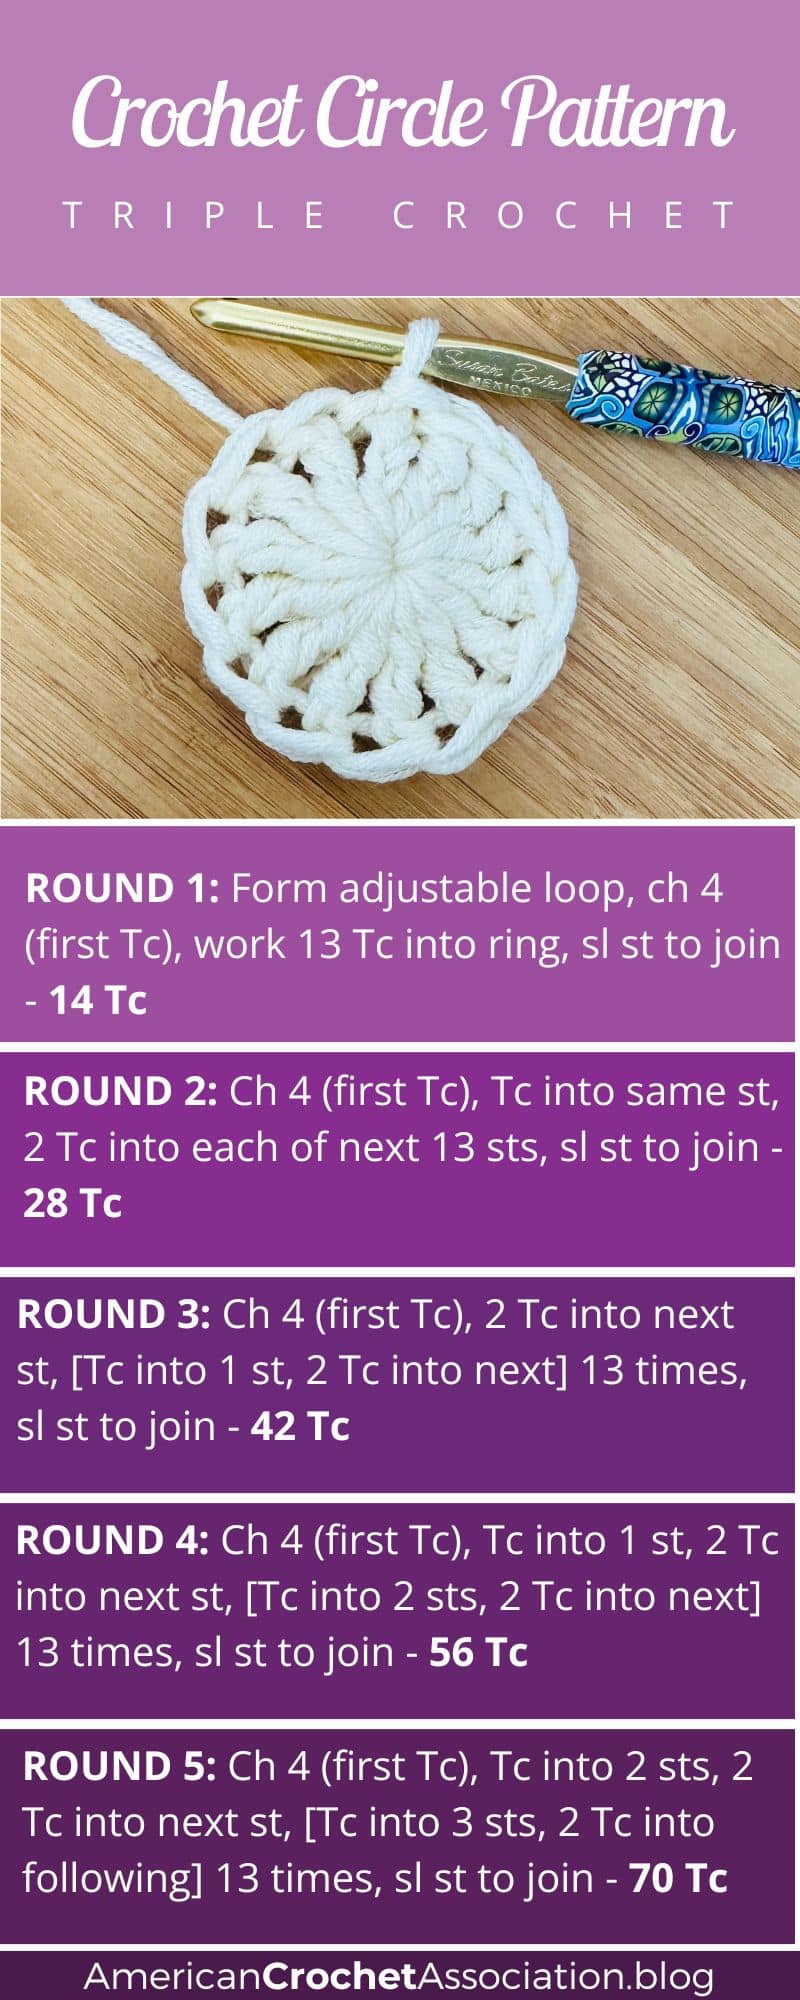
Triple Crochet Circle Pattern
- Form an adjustable loop.
- Round 1 (Right Side): Ch 4 (first Tc, here and throughout), work 13 Tc into loop, Sl st to join – 14 Tc
- Round 2: Ch 4, Tc into same St, work 2 Tc into each St around, Sl St to join – 28 Tc
- Round 3: Ch 4, 2 Tc into next St, [Tc, work 2 Tc into next St] 13 times, Sl St to join – 42 Tc
- Round 4: Ch 4, Tc into next St, T Dc into next St, [Tc into next 2 Sts, 2 Tc into next St] 13 times, Sl St to join – 56 Tc
- Round 5: Ch 4, Tc into next 2 Sts, 2 Tc into next St, [Tc into next 3 Sts, 2 Tc into next St] 13 times, Sl St to join – 70 Tc
Continue the pattern by adding 14 stitches in each new round, spacing the increases evenly all the way around so your circle stays flat and balanced.
Use the Triple Crochet to make this beginner-friendly tote.
Video Chat
Watch this video walkthrough to learn more about crochet circle patterns – single, half double, and double crochet stitches – in rounds: How to crochet flat rounds: Sc, Hdc, Dc:
Join Our Community
If this helped you finally get how crochet circles work (and you’re ready to build even more confidence with your stitches, patterns, and projects), you’ll love the American Crochet Association.
With an ACA Membership, you’ll find step-by-step courses, clear pattern guidance, and a supportive community that helps you grow your skills without the overwhelm.
Because learning crochet shouldn’t feel confusing… it should feel doable, enjoyable, and something you actually stick with.
👉 Find out more about ACA Memberships and keep learning with us.
Peace + Love + Crochet
Salena