Affiliate Disclosure: This post may contain affiliate links, which means the American Crochet Association may earn a small commission from qualifying purchases made through links on our site, at no additional cost to you. Learn more on our Disclosures and Disclaimers page.
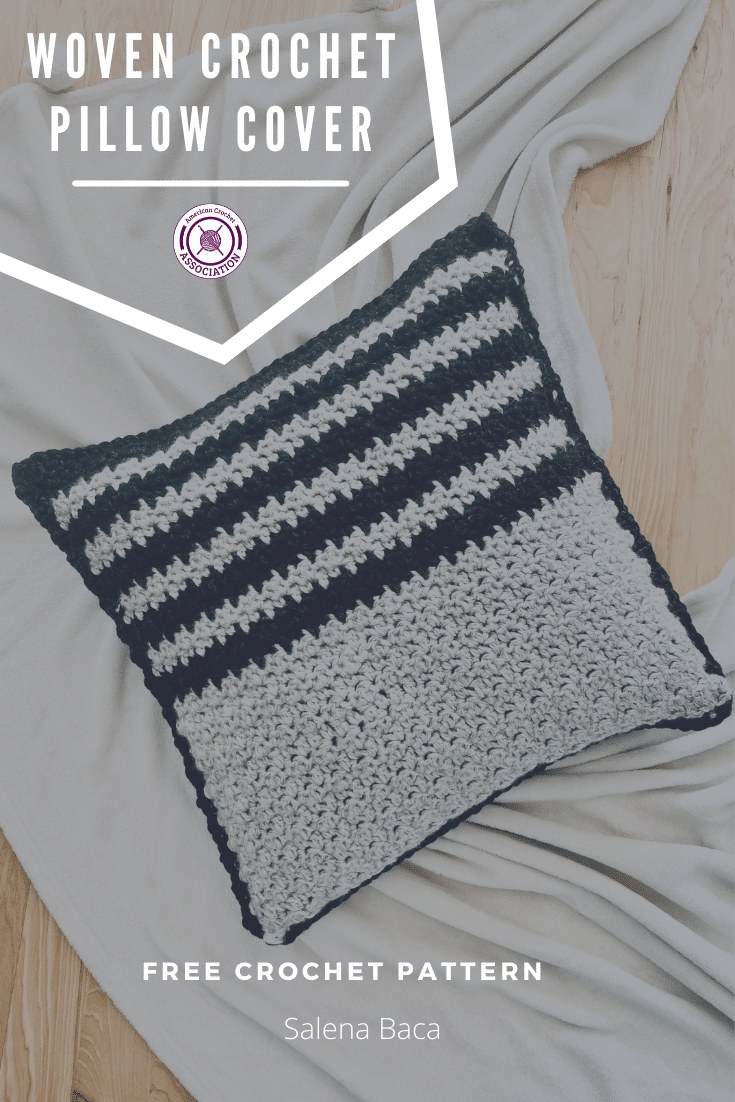
The Woven Crochet Pillow Cover can easily be made in any yarn of your choice, and in any size you want.
This pattern is worked in rows of single and double crochet stitches that work together to create a gorgeous texture.
This crochet pillow cover with a woven fabric is a great pattern to follow because:
- You’ll learn how to resize a stitch repeat to any size you want!
- Redecorate your old throw pillows with crochet!
- This project works great with any yarn you choose (yes, any yarn)!
- You’ll get to practice a lot of crochet skills: stitch repeats, stitch tension, gauge & size, color changes, seams, finishing techniques & more!
Estimated reading time: 5 minutes
Table of contents
This post may contain some affiliate links.

Policy for Individual Use
Pattern Designed By: Salena Baca Crochet. This pattern is copyright protected; it is unlawful to distribute this pattern in any form (free, sale or trade).
Click Here to purchase a downloadable PDF version of this pattern!
Woven Crochet Pillow Cover – Resources
Finished Crochet Pillow Covers
Need some inspiration? Check out other finished woven crochet pillow cover projects today on ravelry, right here:

Woven Crochet Stitch Tutorial
Want to try this stitch on a smaller project first?
The woven stitch is also known as the griddle stitch, and you can follow our written instructions, and video tutorial to Make a Woven Crochet Washcloth today:
Yarn
Any yarn of choice (Sample made with 2 colors Super Bulky Weight #6, appx 375 yds for 18”x18” pillow).
Materials
- Hook that best fits yarn choice
- Scissors
- Yarn needle
- Square pillow form (18” shown)
Size & Gauge
- Size is customizable for any square pillow and yarn you choose when you follow the Swatch For Gauge instructions!
- Measure your project as you go for the best fit.
- Color pattern shown: 50% of rows in Color A, 50% of rows alternating in rows of 2: Color B (2 rows), Color A (2 rows).
Stitch Key
- Ch(s) = chain(s)
- Sc = single crochet
- Dc = double crochet
- Sl St = slip stitch
- St(s) = stitch(es)
Pattern Notes
- Fabric is reversible; either side can be right side.
- Woven Pillow Cover created in 2 parts: Front / Back (rows), Border (rounds).
- Video: How To change color in rows (change color as desired).
- Video: Woven Crochet Stitch
- To work this pattern:
- Choose pillow size,
- Choose yarn,
- Swatch for gauge, to find your base chain & row repeats,
- Follow Pillow Cover instructions using Swatch outcomes.
Griddle Stitch Pattern
Swatch For Gauge
Using any yarn of your choosing, Ch 21.
Check out our Crochet Memberships for all skill levels!
From First Stitch to Crochet Career, Unravel Your Complete Journey With The American Crochet Association!
Row 1: Skip 1 Ch (not a St), [Sc into 1 St, Dc into next St] across row – 20 Sts; 10 Sc + 10 Dc
Row 2: Ch 1 (not a St), turn, [Sc into 1 St, Dc into next St] across row – 20 Sts; 10 Sc + 10 Dc
Repeat row 2 until 10 rows complete, fasten off.
Measure Stitches
- 20 Sts = _____” (width)
- Divide 20 by inches = _____ Sts per inch.
Measure Rows
- 10 rows = _____”; (height)
- Divide inches by 10 rows = _____ Inches per row.
Pillow Form (size of your pillow)
- Base Chain: Pillow Width _____ x Sts per inch _____ = _____ (round up or down to make odd)
- Row Repeats: Height of pillow _____ divided by inches per row _____ = total rows
Woven Crochet Pillow Cover – Instructions
Front & Back (repeat twice)
Chain, according to the size of your pillow form.
Row 1: Skip 1 Ch (not a St), [Sc into 1 St, Dc into next St] across row.
Row 2: Ch 1 (not a St), turn, [Sc into 1 St, Dc into next St] across row.
Repeat row 2 until the size of your pillow form is reached. Fasten off.
Border
Hold Front & Back together so that the first and last rows are evenly aligned. Join yarn into both thicknesses of Front & Back, at last St of last row worked.
Round 1: Ch 1 (not a St). Rotate to work along Left side of Front & Back; work 3 Sc into the side of each Sc St across. Rotate to work along Row 1; [work 2 Sc into 1st St, skip 1 St] across. Rotate to work along Right side of Front & Back; work 3 Sc into the side of each Sc St across. Insert pillow form. Rotate to work along last row; [work 2 Sc into 1st St, skip 1 St] across, Sl St into top of first Sc, fasten off.
Finishing
Sew in ends, trim excess.
Click Here to share your finished project in our community!
Peace + Love + Crochet
Salena