Affiliate Disclosure: This post may contain affiliate links, which means the American Crochet Association may earn a small commission from qualifying purchases made through links on our site, at no additional cost to you. Learn more on our Disclosures and Disclaimers page.
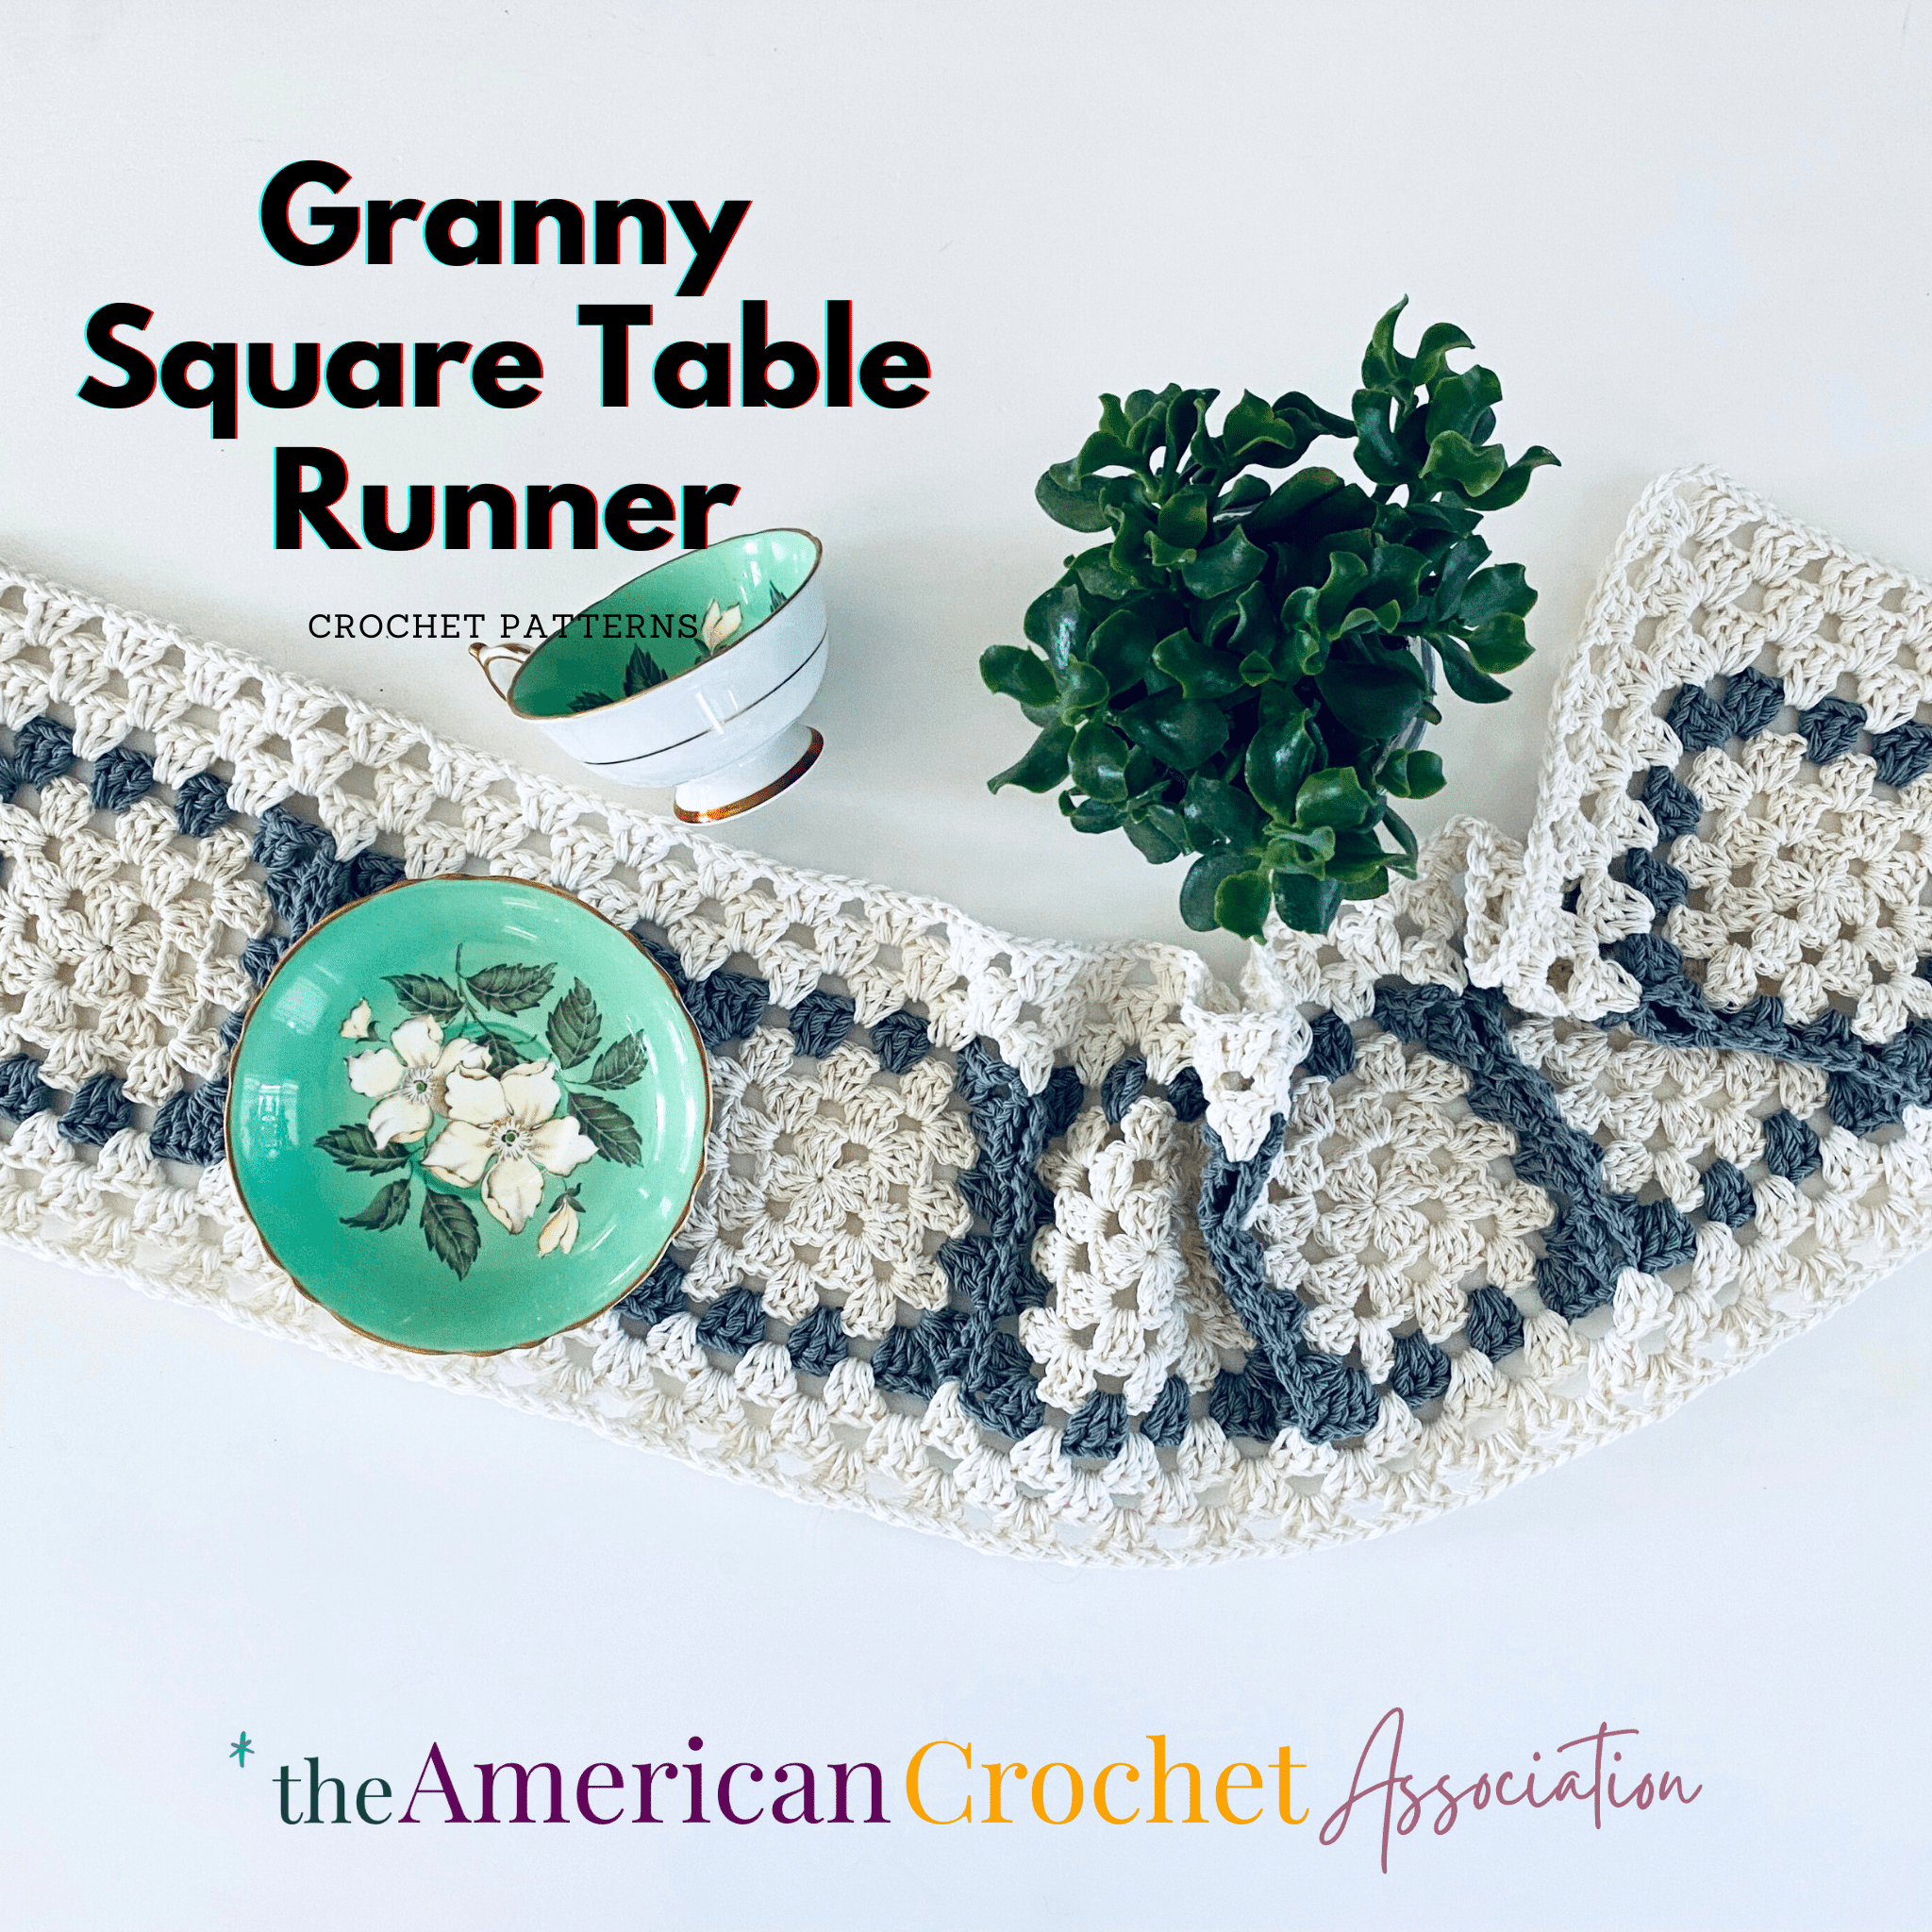
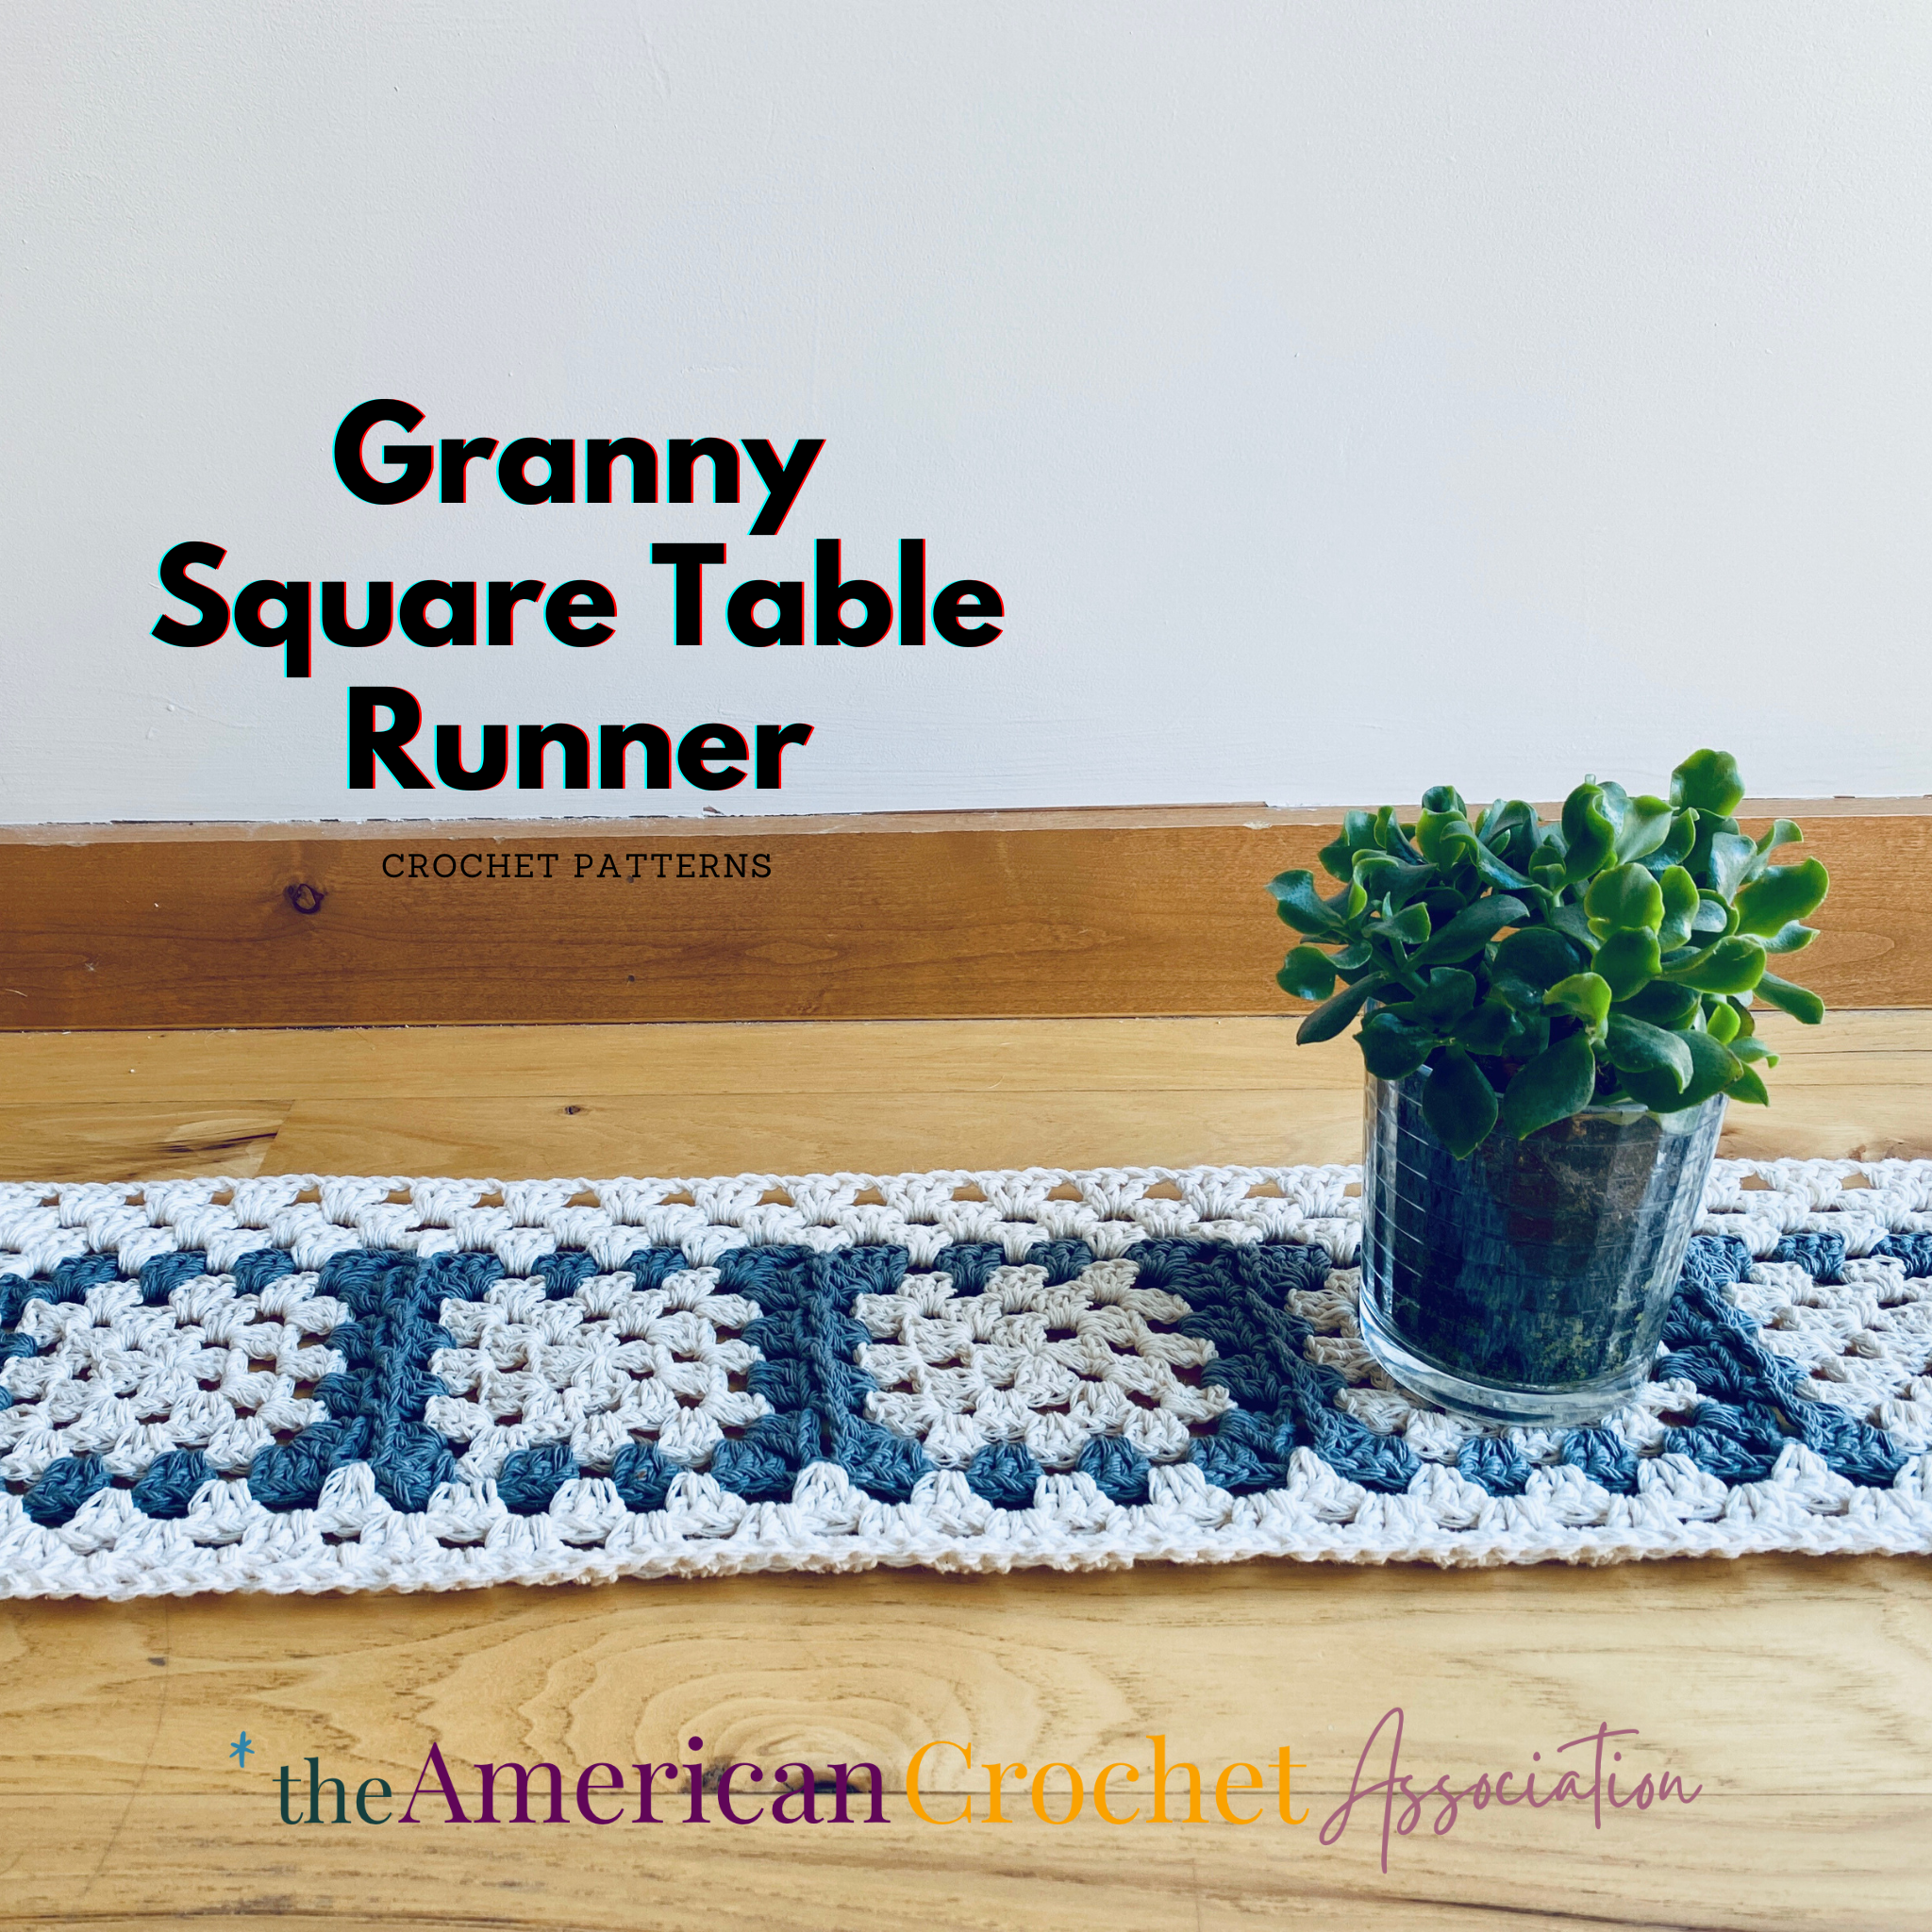
If you love the classic granny square motif, give this crochet table runner a try today with our step-by-step pattern and tutorials!
Each granny square is created individually, then joined to the last one worked with crochet using the JAYGO (join-as-you-go) method for a gorgeous and seamless look!
An interesting feature in this pattern is that it can be worked in any size you choose; make the granny squares larger or smaller, make the table runner longer or shorter, and add as much or little border as you want!
This Granny Square crochet table runner is a great design to crochet because:
- You can use yarn you already have on hand!
- Learn how to make a granny square, and the JAYGO method!
- These projects use very little yarn, so they’re great stash-busters!
- You’ll get to practice a lot of crochet skills: Motifs, joined rounds, joining motifs, complex stitch and round repeats, shaping, color placement and changing, finishing techniques & more!
This post may contain some affiliate links.
Estimated reading time: 9 minutes
Table of contents
Crochet Table Runner: Resources
What is a Granny Square
Granny squares are an iconic pattern in crochet.
This crochet motif can be a simple afghan or create the building blocks for projects like this crochet table runner.
To learn how to crochet a granny square, follow our simple instructions, chart, and video tutorial to help you learn today: Granny Square Pattern
Finished Crochet Table Runners
Want to see how other crocheters worked up this crochet pattern?
Click on over to Ravelry to view dozens of projects completed and posted for this pattern so far, including the yarns they chose: https://www.ravelry.com/patterns/library/granny-square-table-runner-3

More Granny Square Patterns
If you love granny squares, like this crochet table runner, and want to find even more designs that use this square motif, check these out:
Granny Square Vest
Want to wear some classic granny squares?
Give this easy vest a try!
Video tutorial, crochet chart and pattern diagram included: Granny Square Vest: Easy Crochet Pattern With Chart
Granny Square Market Bag
Want to turn your granny squares into a crochet bag?
Give this market tote a try!
This crochet market tote is worked with a classic granny square motif, creating a modern looking and sturdy design: Granny Square Bag: Easy Crochet Tote Pattern
Granny Square Pillow Cover
Create your own granny square pillow cover using any yarn, and in any size you choose, with this outline of granny square instructions: Granny Square Crochet Pillow Cover
Selecting Yarn
This granny square crochet table runner was made with two contrasting colors of Bernat Handicrafter cotton solids, which is a medium weight yarn in the #4 category.
No matter where your crochet table runner will be (dining room, entry way, coffee table), it is likely to get dirty with dust or food.
That’s why cotton yarn is a great choice for making projects that should will get a lot of wear and washing – this material is very durable!
However, a crochet table runner is also a decorative piece that should fit the look sand style wherever it goes.
That’s why you can make this project in any yarn weight, type, and color you like best!
To get some ideas, this crochet table runner has been make into a wall hanging and even a book mark with thread!
To learn more about all the different weights of yarn in crochet, I’ve put all my best tips (and a handy chart) right here: Understanding Yarn Substitution: An Easy Reference For Crocheters
Policy For Individual Use
This crochet pattern is designed by Salena Baca Crochet for the American Crochet Association.
Pattern instructions are protected by copyright laws.
Check out our Crochet Memberships for all skill levels!
From First Stitch to Crochet Career, Unravel Your Complete Journey With The American Crochet Association!
Users must acknowledge and respect the intellectual property rights of pattern creators and designers as follows:
- This pattern is for personal use only. Pattern instructions may be accessed and used by individuals for personal, non-commercial purposes only. Users may create finished products based on the pattern instructions for personal use or gifting.
- Users may not reproduce, distribute, modify, or create derivative works of pattern instructions without explicit permission from the copyright holder.
- Selling or commercially exploiting products made from pattern instructions will require additional permissions or licensing from the copyright holder.
- It is unlawful to share or distribute pattern instructions in any way, including but not limited to: print, digital, video.
- It is unlawful to create derivative works based on pattern instructions, including but not limited to translations, adaptations, or variations.
- Users should provide proper attribution when sharing or displaying finished products made using these pattern instructions, giving credit to the original pattern creator and source.
- Users are expected to conduct themselves in an ethical and respectful manner when using pattern instructions. Users should not engage in plagiarism, claim others’ work as their own, or misrepresent the origin of pattern instructions.
By accessing and using pattern instructions, individuals agree to abide by the usage policy herein.
Users may be held responsible for any damages or legal liabilities resulting from their non-compliance with this policy.
Purchase a PDF File On Ravelry
Want to own a copy of this pattern that you can save, print, download, and use anytime?
Get the PDF file, without all these extra tips, resources, and pattern details when you purchase a downloadable PDF version of this pattern on Ravelry.
How To Crochet A Table Runner
Granny Square Tips
The granny square is not truly a pattern that is beginner friendly, so these tips may help as you work to crochet your very first one:
- Watch our entire Granny Square video tutorial first, before you follow along with yarn and hook.
- Read the written instructions as you watch the video tutorial (they are the same)
- Follow the stitch chart as you watch the video, or as you read the written instructions (yes, they all match)
- Follow the instructions to the comma, working just one step at a time, then double check that your work matches the pattern before moving on to the very next step.
Granny Square Video Tutorial
If you’ve never worked a granny square pattern before, use our video as you read the written instructions and stitch chart until your comfortable with the pattern: How To Crochet A Granny Square Tutorial.
Yarn
Any yarn of choice (Sample made with 2 colors Worsted Weight #4, appx 250 yds, 100% cotton).
Materials
- Hook that best fits yarn choice
- Scissors
- Yarn needle
Size and Finished Measurements
Measure your project as you go for the desired dimensions.
One granny square motif in this pattern is the base for the measurements, and can act as a gauge swatch for your total dimensions.
To learn more about what a swatch is, and how to use them in crochet, here are all my best tips: How To Crochet a Swatch
Stitch Key
The classic granny square pattern is worked with basic crochet stitches in their most basic form.
To see any of these stitches worked by following a video tutorial, just click on the underlined text:
- Ch(s) = chain(s)
- Sc = single crochet
- Dc = double crochet
- St(s) = stitch(es)
- Sl St = slip stitch
Specialty Stitches and Techniques
If you’re unfamiliar with any of the specialty stitches or techniques listed in this section, be sure to watch our quick video tutorial today to help you get started:
Adjustable Loop
Join As You Go (JAYGO)
Worked by replacing a chain space in the current motif with a slip stitch into the connecting motif.
Color Change
Change color as desired, or follow the color change sequence outlined in the notes section of this pattern.
Notes
- Granny square crochet table runner created in 2 parts: Joining Squares, Border.
- This crochet table runner may be created in any size; measure 1 Joining Square, repeat pattern until your desired length is met. Border creates some additional length and width, which may also be repeated as desired.
- Change color as desired (example shows color A: Joining Squares rounds 1-3 and Border. Color B: Joining squares round 4).
Crochet Table Runner Instructions
Joining Squares
Work any number of Joining Squares as desired.
Beginning with square 2, attach each square with Right Side facing to the last.
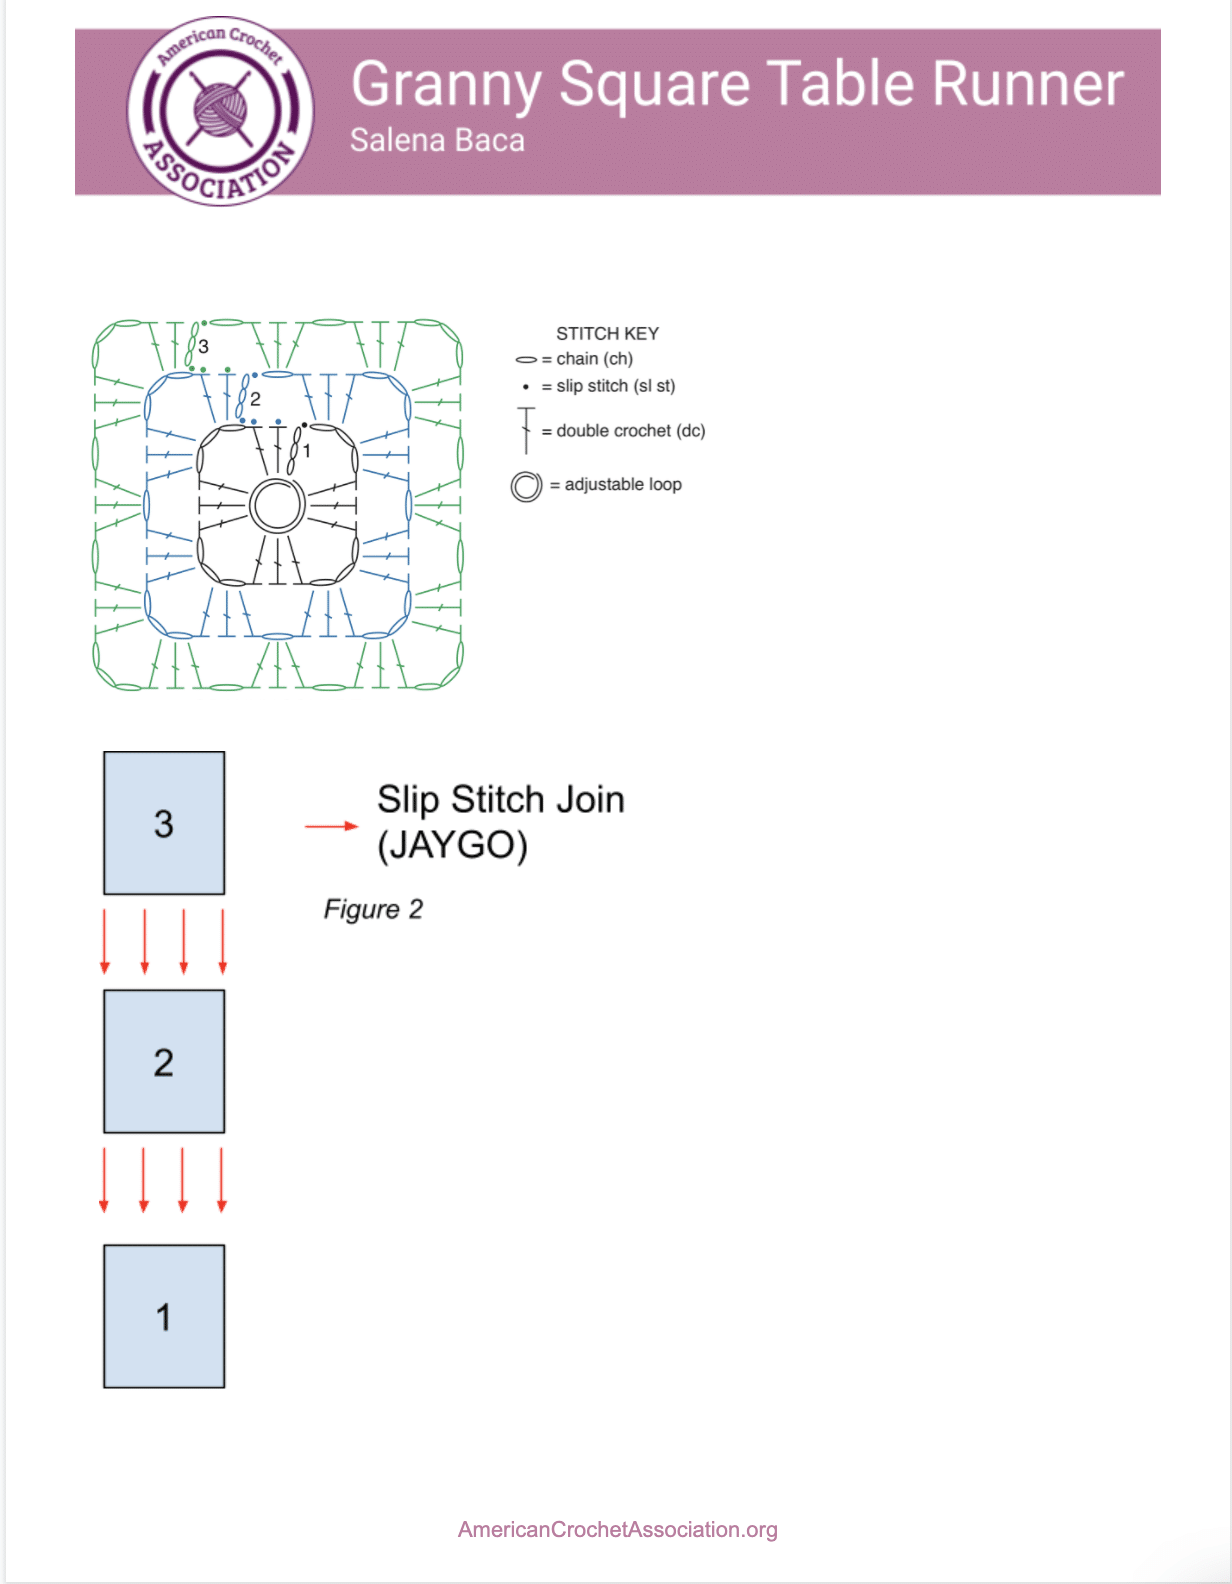
Join on one side with JAYGO method for: 2nd Ch of Ch-3 corner, Ch-1 space, Ch-1 space, Ch-1 space, 2nd Ch of Ch-3 corner (figure 2)
- Round 1 (Right Side): Form adjustable loop, Ch 3 (first Dc, here and throughout), work 2 Dc into loop, [Ch 3, 3 Dc] 3 times, Ch 3, Sl St into top of beginning Ch-3 to join – 24 Sts; 12 Dc + 4 Ch-3 spaces
- Round 2: Sl St into each of next 2 Dc, Sl St into Ch-3 space, Ch 3, (2 Dc, Ch 3, 3 Dc) into same Ch-3 space, Ch 1, [(3 Dc, Ch 3, 3 Dc) into next Ch-3 space, Ch 1] 3 times, Sl St into top of beginning Ch-3 to join – 40 Sts; 24 Dc + 4 Ch-3 spaces + 4 Ch-1 spaces
- Round 3: Sl St into each of next 2 Dc, Sl St into Ch-3 space, Ch 3, (2 Dc, Ch 3, 3 Dc) into same Ch-3 space, Ch 1, (3 Dc, Ch 1) into Ch-1 space, [(3 Dc, Ch 3, 3 Dc) into next Ch-3 space, Ch 1, (3 Dc, Ch 1) into Ch-1 space] 3 times, Sl St into top of beginning Ch-3 to join – 56 Sts; 36 Dc + 4 Ch-3 spaces + 8 Ch-1 spaces
- Round 4: Repeat round 3, fasten off – 72 Sts; 48 Dc + 4 Ch-3 spaces + 12 Ch-1 spaces
Repeat round 1-4 (using JAYGO for the last round) creating desired number of squares.
Border
Assure Right Side is facing, attach yarn into any unworked ch-3 corner from Joining Squares.
- Round 1: Ch 3 (first Dc), (2 Dc, Ch 3, 3 Dc) into same Ch-3 space, Ch 1. Work around: (3 Dc, Ch 1) into each Ch-1 space and Sl St join, (3 Dc, Ch 3, 3 Dc, Ch 1) into each Ch-3 space. Sl St into top of beginning Ch-3 to join.
- Round 2: Sl St into each of next 2 Dc, Sl St into Ch-3 space, Ch 3, (2 Dc, Ch 3, 3 Dc) into same Ch-3 space, Ch 1. Work around: (3 Dc, Ch 1) into each Ch-1 space, (3 Dc, Ch 3, 3 Dc, Ch 1) into each Ch-3 space. Sl St into top of beginning Ch-3 to join.
Repeat round 2 once more, fasten off.
Stitch Chart and Diagram
Finishing
Sew in all ends, trim excess.
Video Chat
To hear more about this Granny Square Crochet Table Runner Pattern from Salena Baca (the pattern writer), listen to this video chat today:
Click Here to share your finished project in our community!
Peace + Love + Crochet
Salena